Add HiLinkup custom models to WorkBuddy through the Chat Completions protocol.
WorkBuddy supports custom OpenAI-compatible models. Enter the HiLinkup Chat Completions endpoint, an API key, and an exact model ID to make the model available in the WorkBuddy model menu.
The Chat Completions endpoint: https://api.hilinkup.com/v1/chat/completions
A currently available HiLinkup model ID.
Enter your API key only in the WorkBuddy API Key field. Do not expose a real key in screenshots, chat messages, or project files.
Prefer the complete provider/model ID returned by HiLinkup, such as aliyun/kimi-k3. Sending only kimi-k3 uses the platform’s current default provider setting. Check List models instead of copying legacy model names from the screenshots.
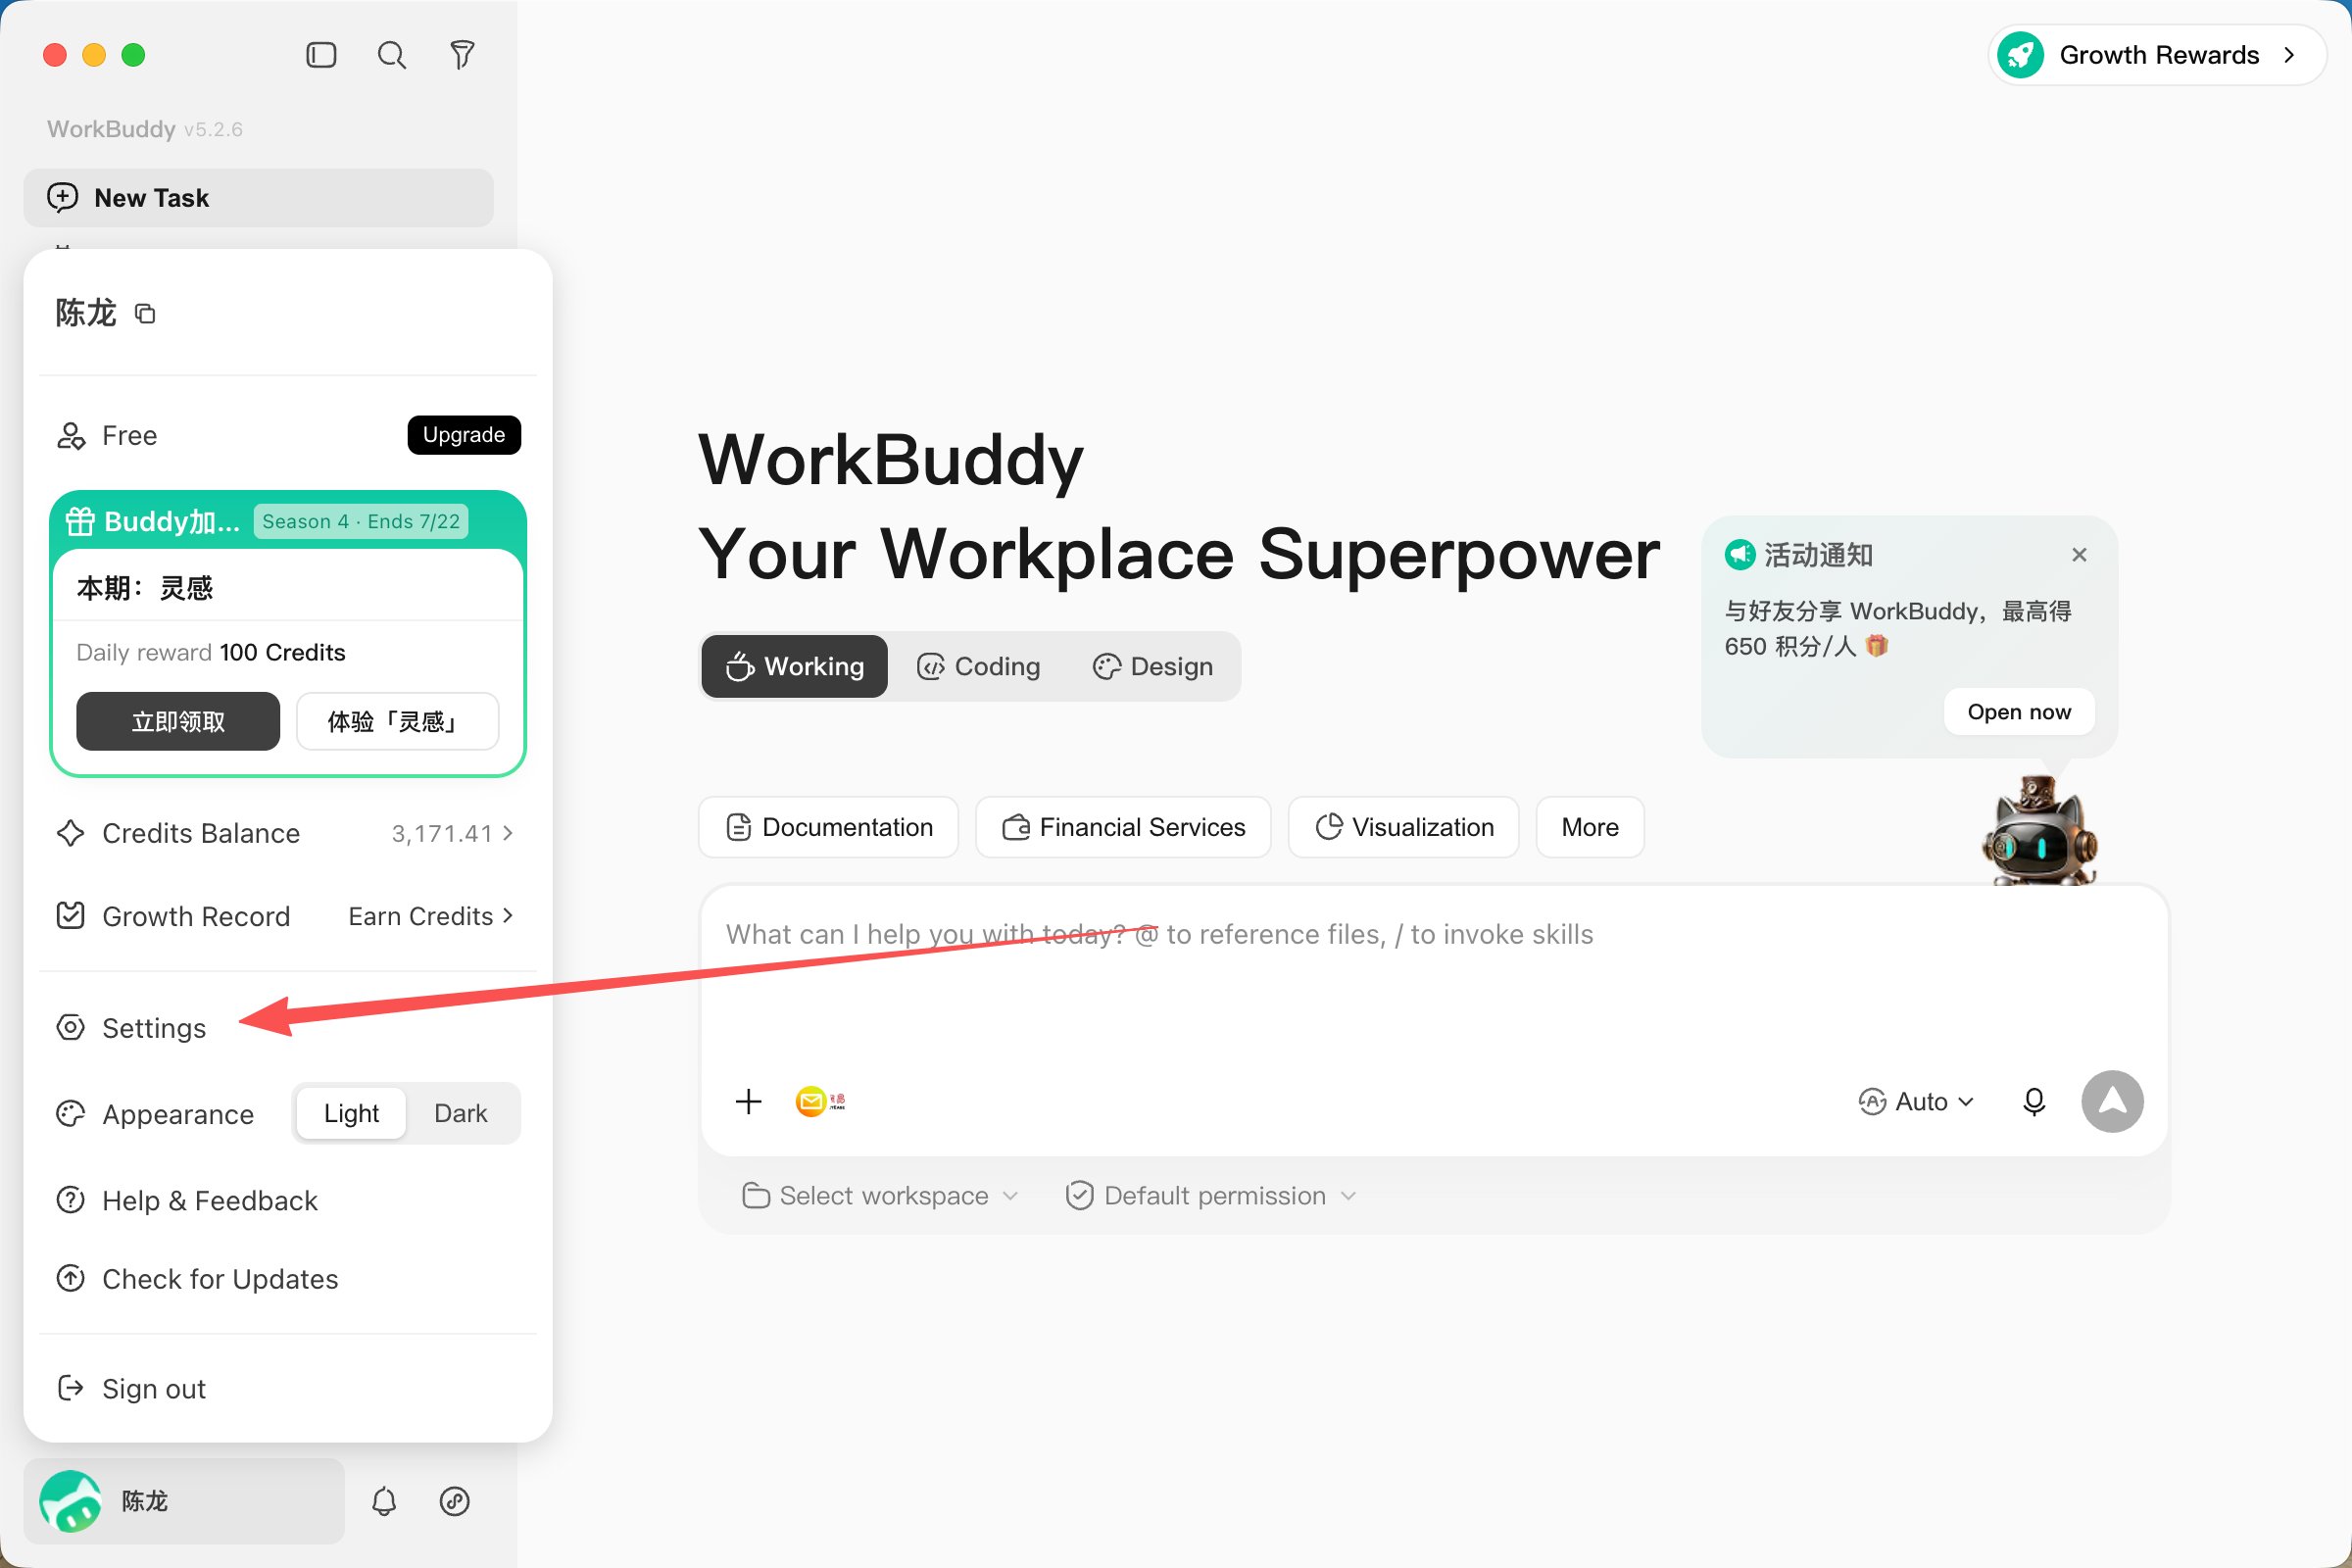
Open WorkBuddy and click the avatar or account area in the lower-left corner. Select Settings from the account menu.
Open Settings from the WorkBuddy account menu
2
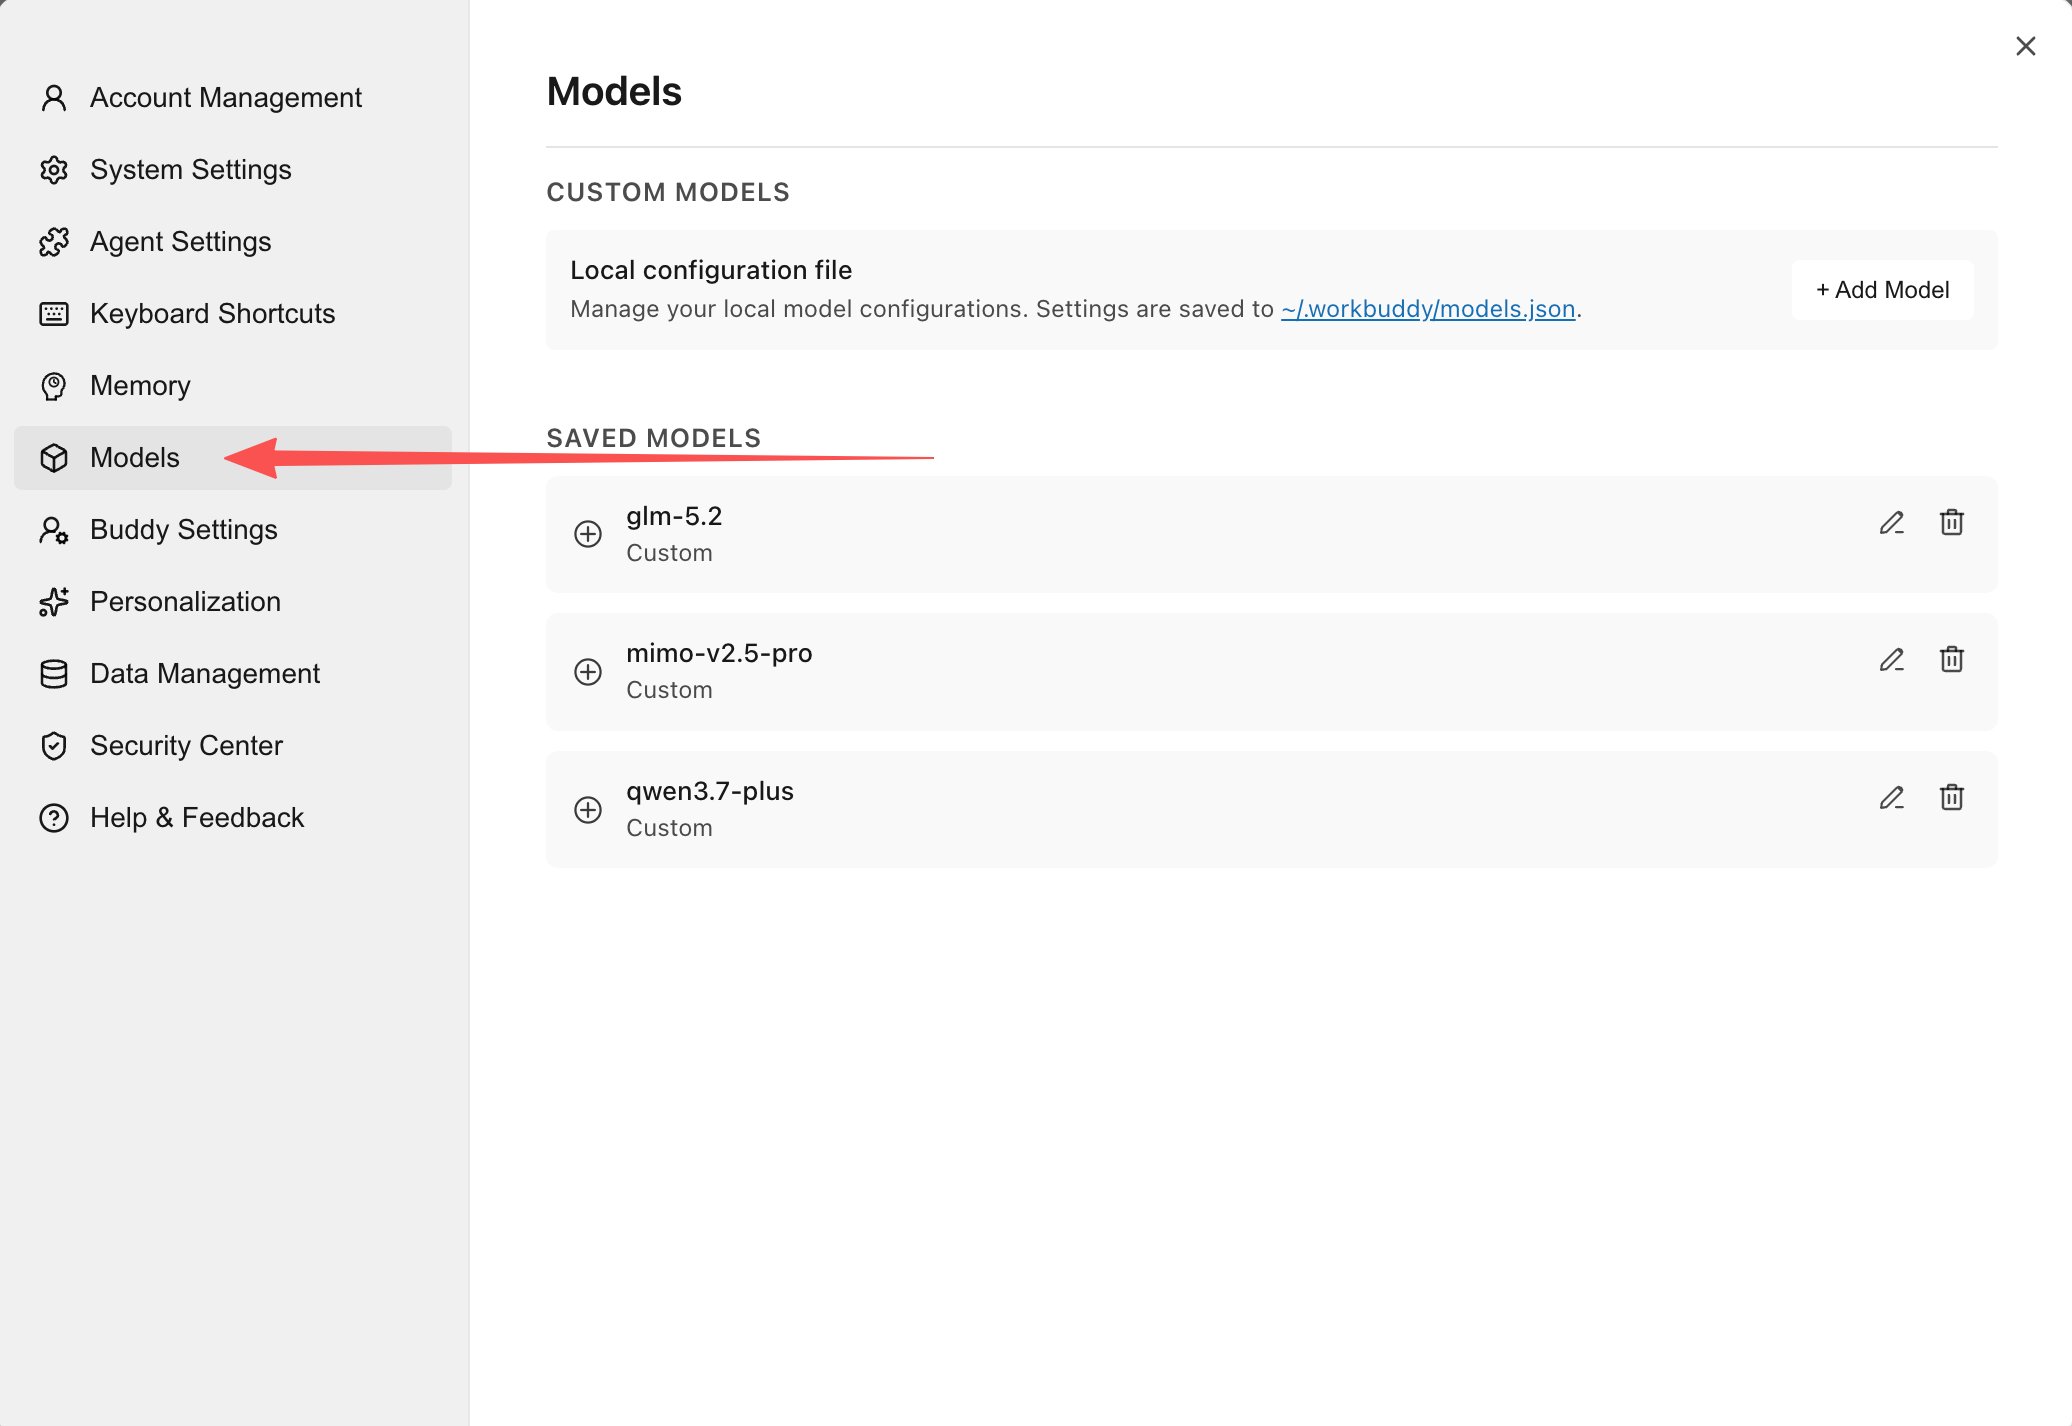
Open model settings
Select Models in the settings sidebar to open custom model management, then click Add Model in the upper-right corner.
Open Models and click Add Model
WorkBuddy stores custom model settings locally in ~/.workbuddy/models.json. You normally do not need to edit this file directly.
3
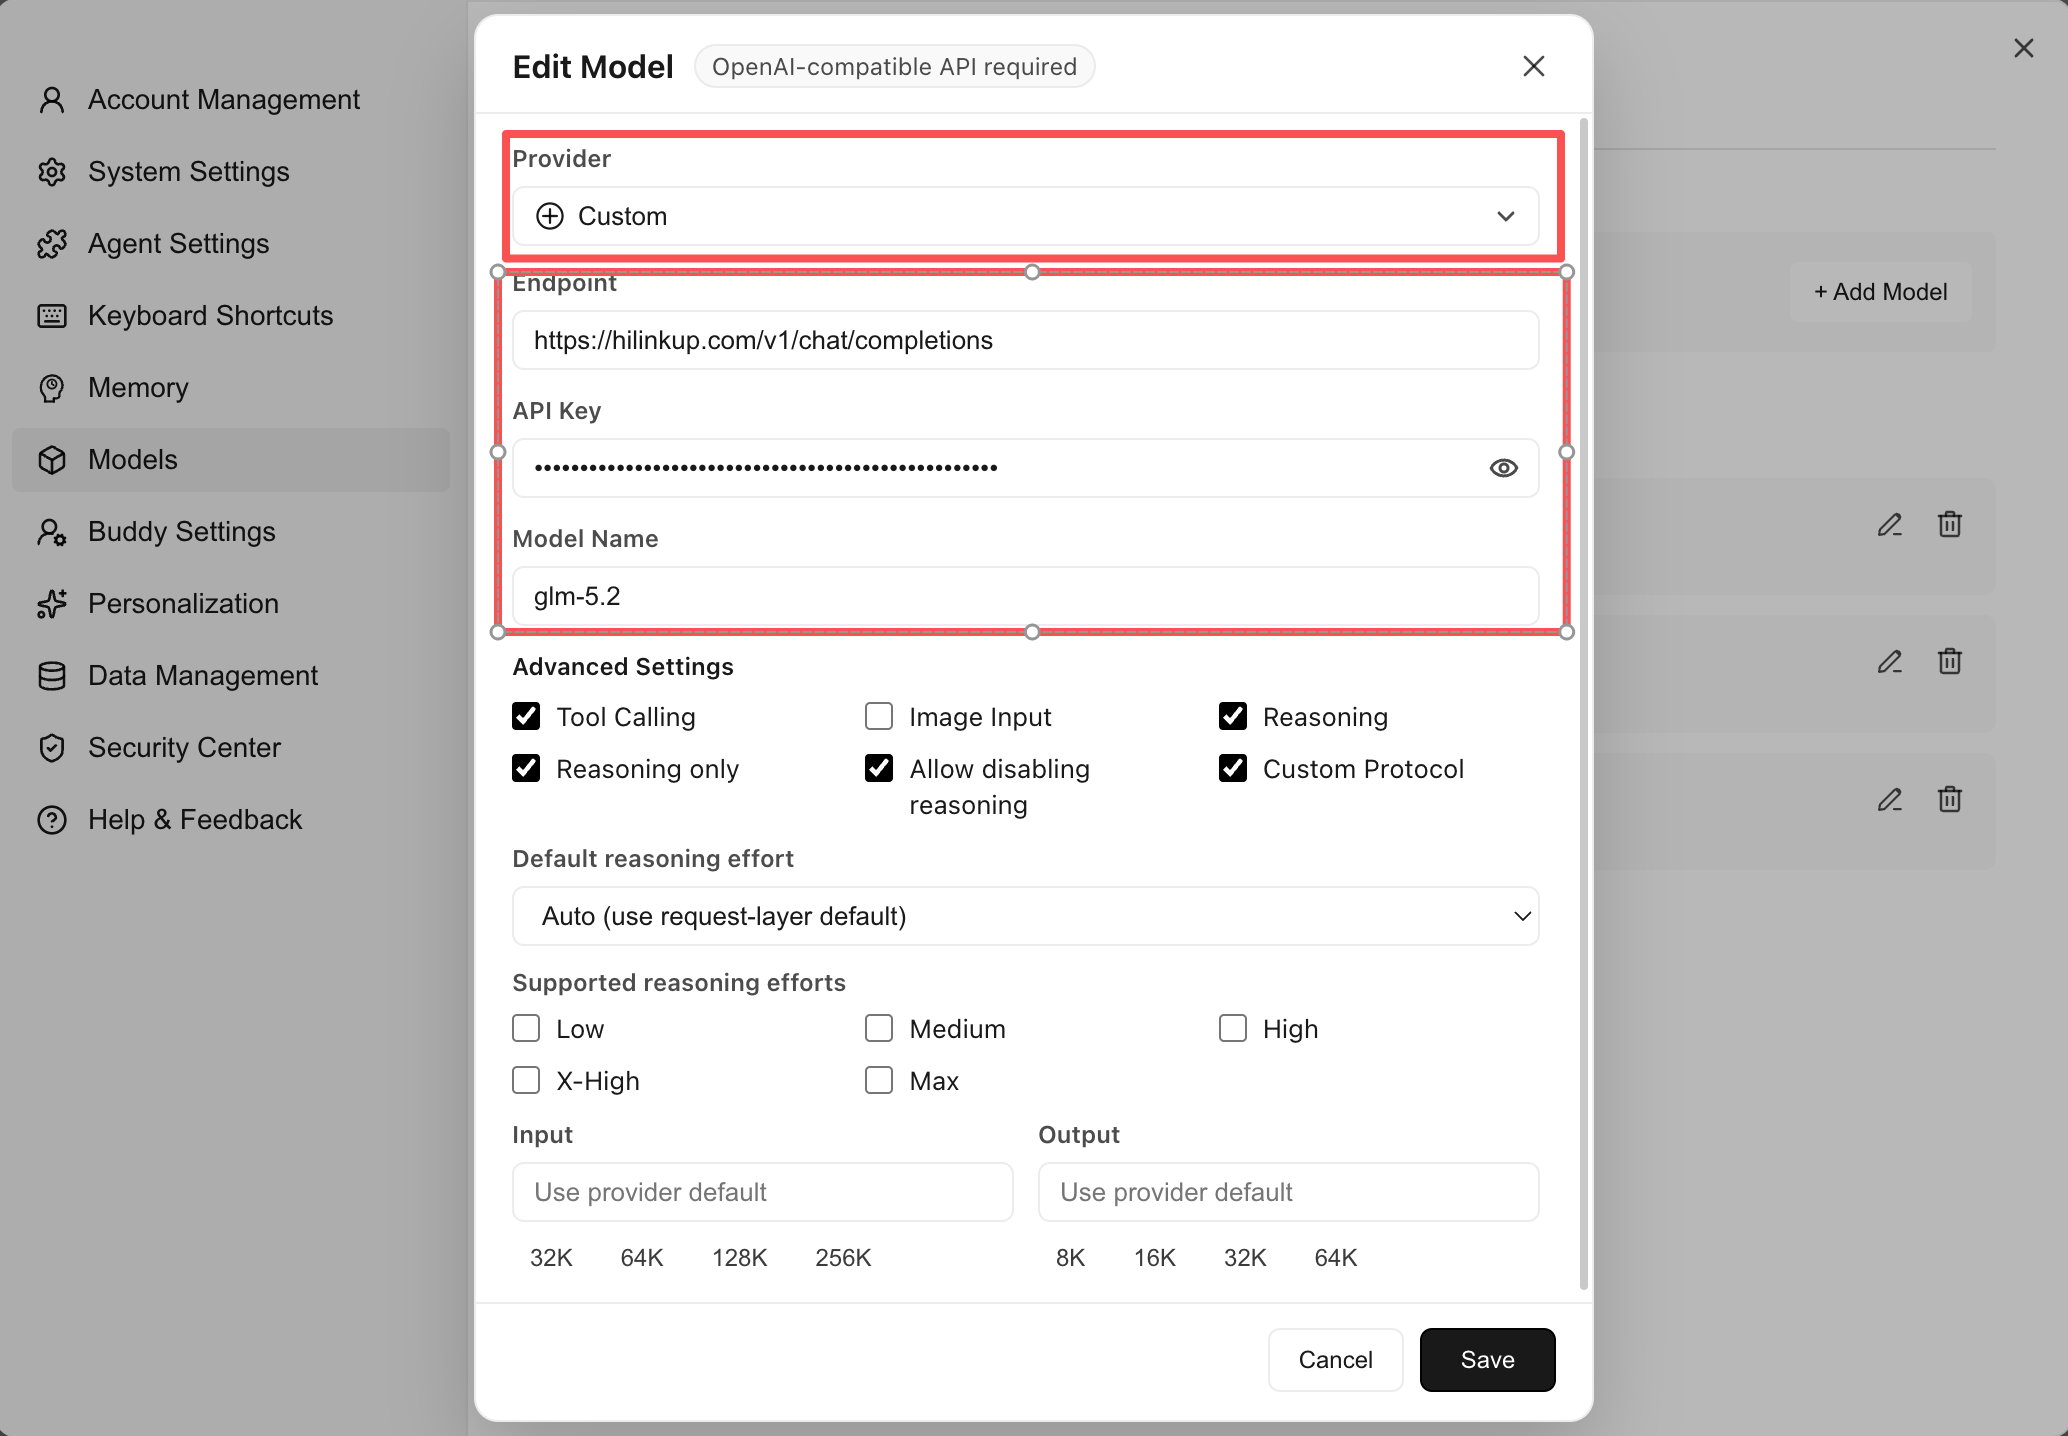
Enter the HiLinkup model settings
Use the following values:
Field
Value
Provider
Custom
Endpoint
https://api.hilinkup.com/v1/chat/completions
API Key
Your API key from the HiLinkup console
Model Name
An exact model ID returned by HiLinkup, such as aliyun/kimi-k3
Select Custom and enter the HiLinkup endpoint, API key, and model name; use the API domain and Chat Completions path shown in this guide
The /v1/chat/completions path in the screenshot is correct, but the screenshot uses the old domain. Enter the current full endpoint: https://api.hilinkup.com/v1/chat/completions.
Tool calling, image input, reasoning, and the other advanced options depend on the selected model. Enable only capabilities that the model supports. Keep the defaults when you are unsure.Click Save. Repeat this step for each additional model you want to use.
4
Use the model in WorkBuddy
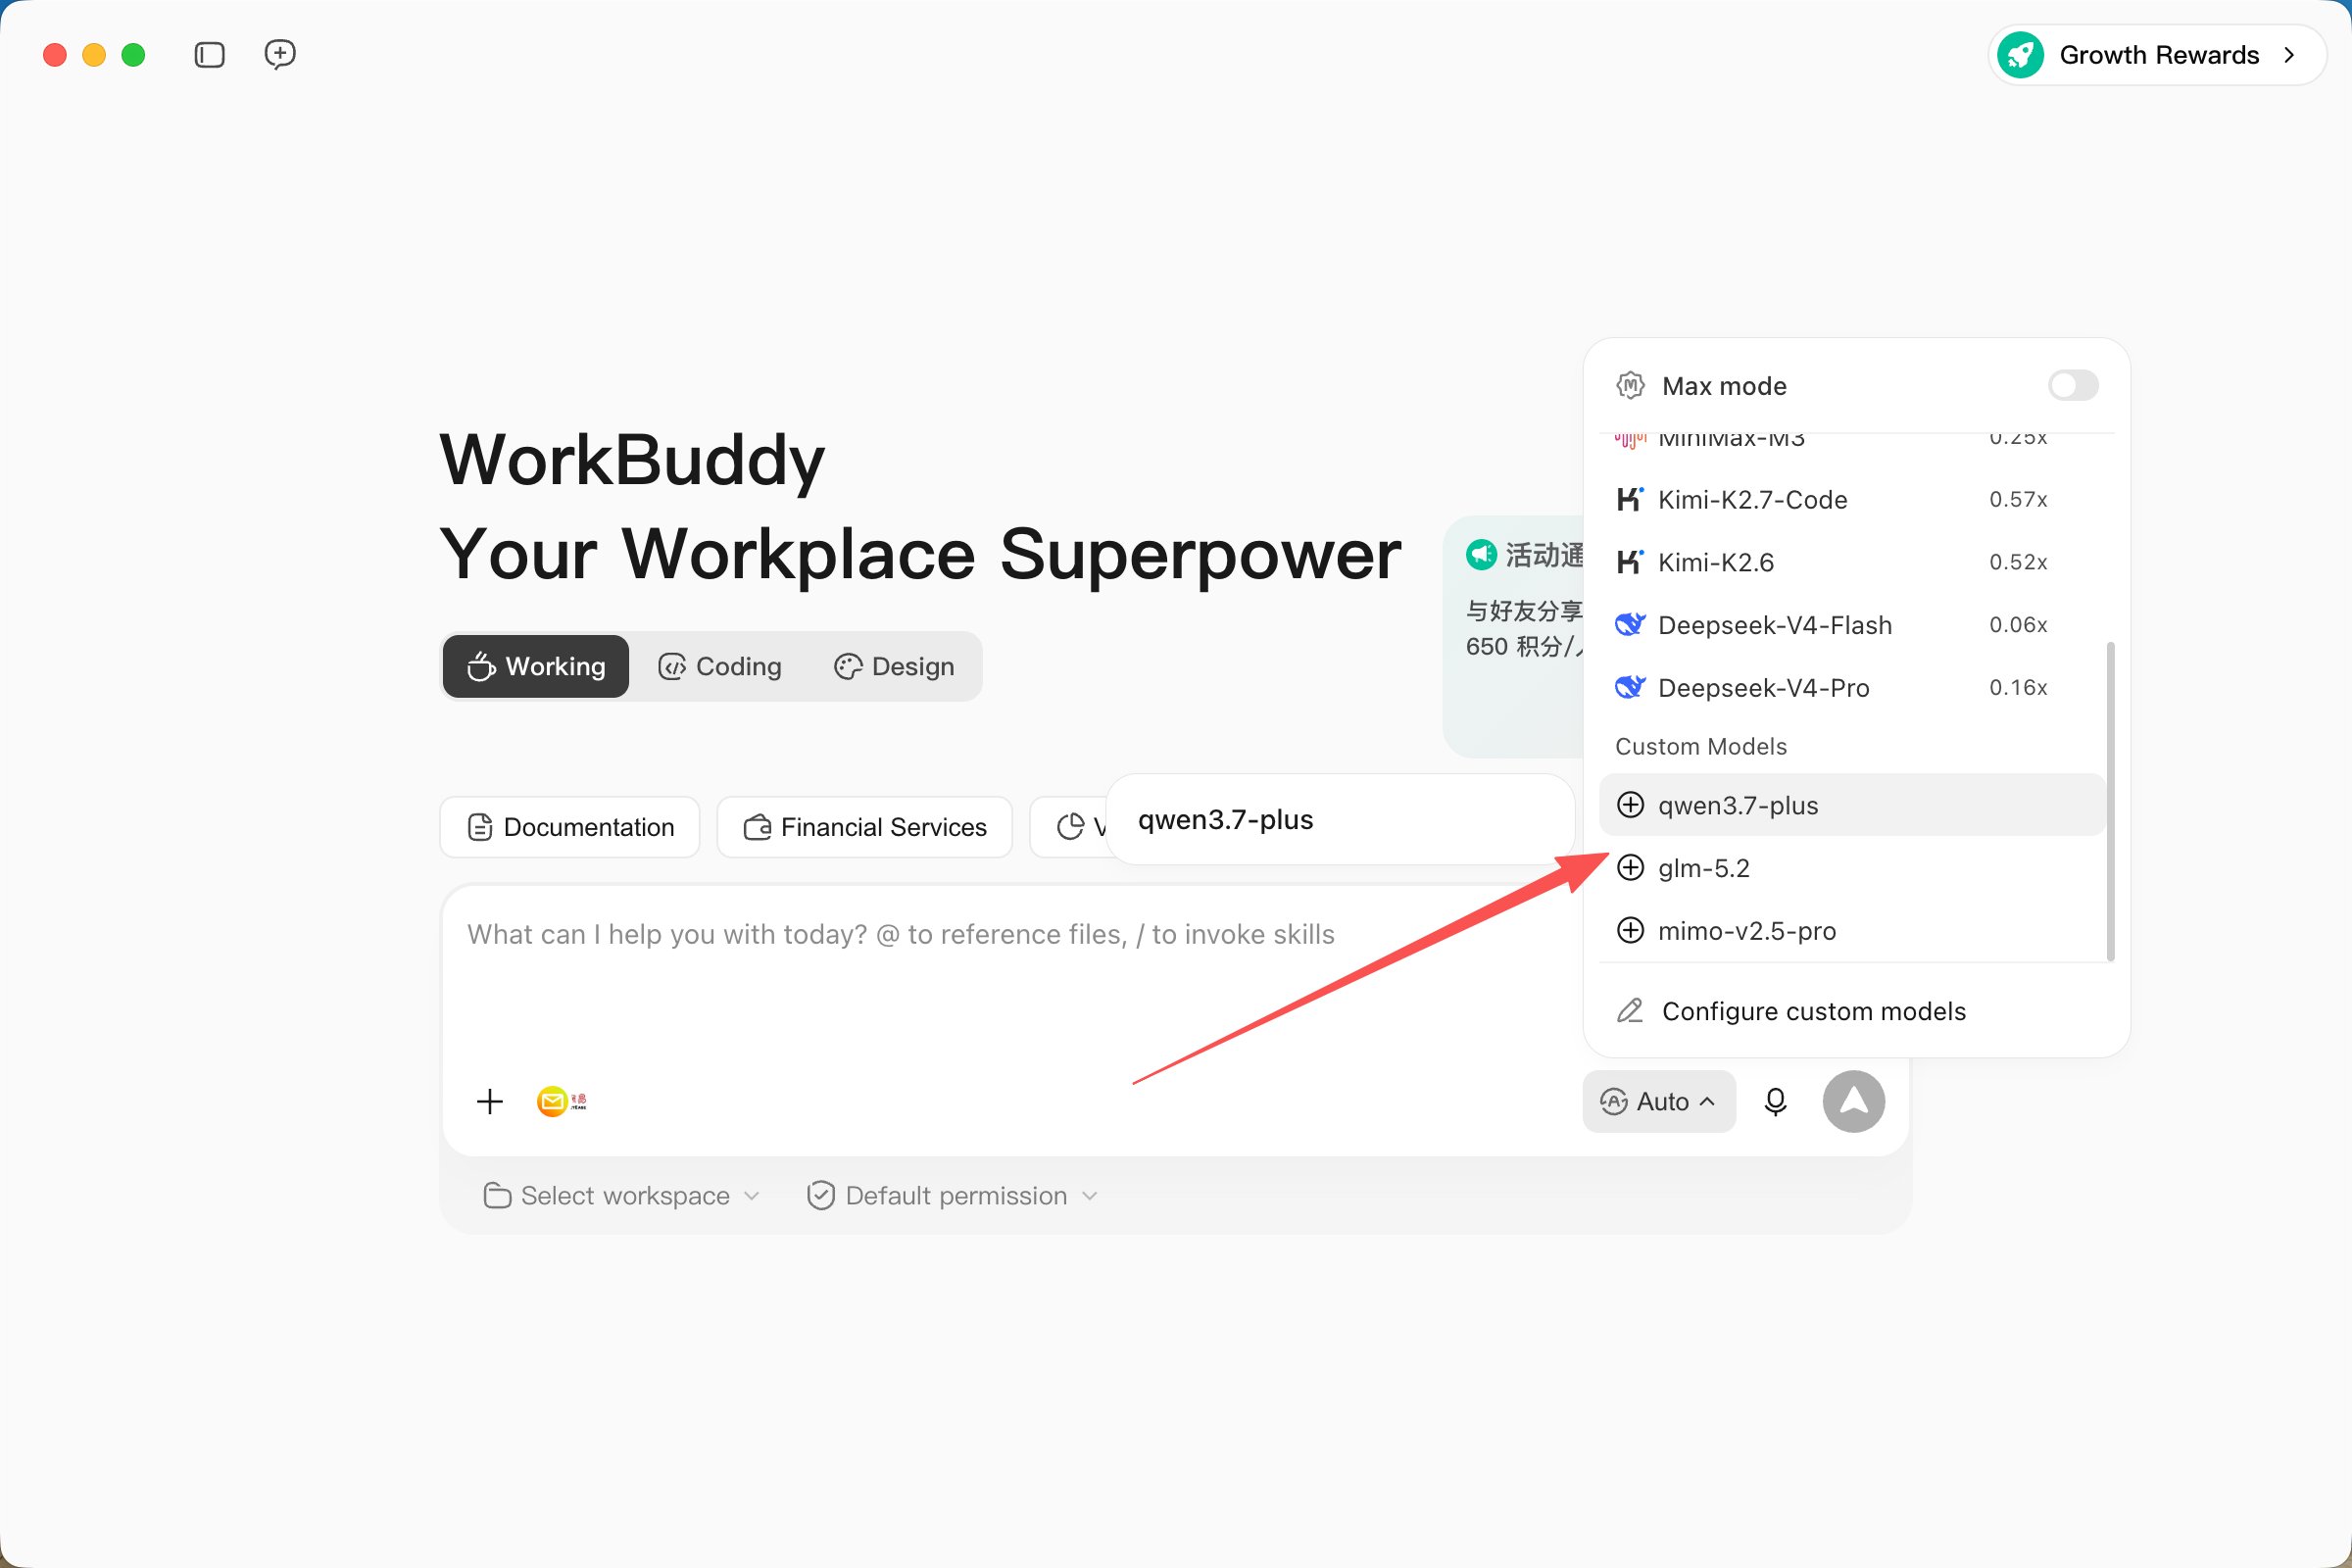
Return to the WorkBuddy home screen and open the model menu next to the prompt box. Select the saved model under Custom Models, then send a short test message.
Select a HiLinkup model under Custom Models
The configuration is active when the model appears in the model menu and returns a response.
Confirm that you clicked Save. Close and reopen the model menu. If the model is still missing, fully quit and restart WorkBuddy.
The request returns 401 or 403
Verify that the API key is complete and active and that the account can access the selected model. Do not add spaces or quotation marks around the key.
The request returns 404
The Endpoint must be the full path https://api.hilinkup.com/v1/chat/completions, not only https://api.hilinkup.com/v1 and not /v1/responses.
The model name is invalid or unavailable
Use a data[].id value returned by GET /v1/models as the Model Name. The list can change, so rely on the live HiLinkup model list.
Tools, images, or reasoning do not work
These capabilities depend on the model and upstream channel. Disable the related advanced option and verify plain text first, then retest with a model that explicitly supports the capability.