Use CC Switch to connect the Codex desktop app to HiLinkup and select Chinese AI models.
This guide shows you how to add HiLinkup as a provider for the Codex desktop app through CC Switch. After setup, you can select Chinese AI models provided by HiLinkup directly from the Codex model menu.
Download CC Switch
Download the version of CC Switch for your operating system.
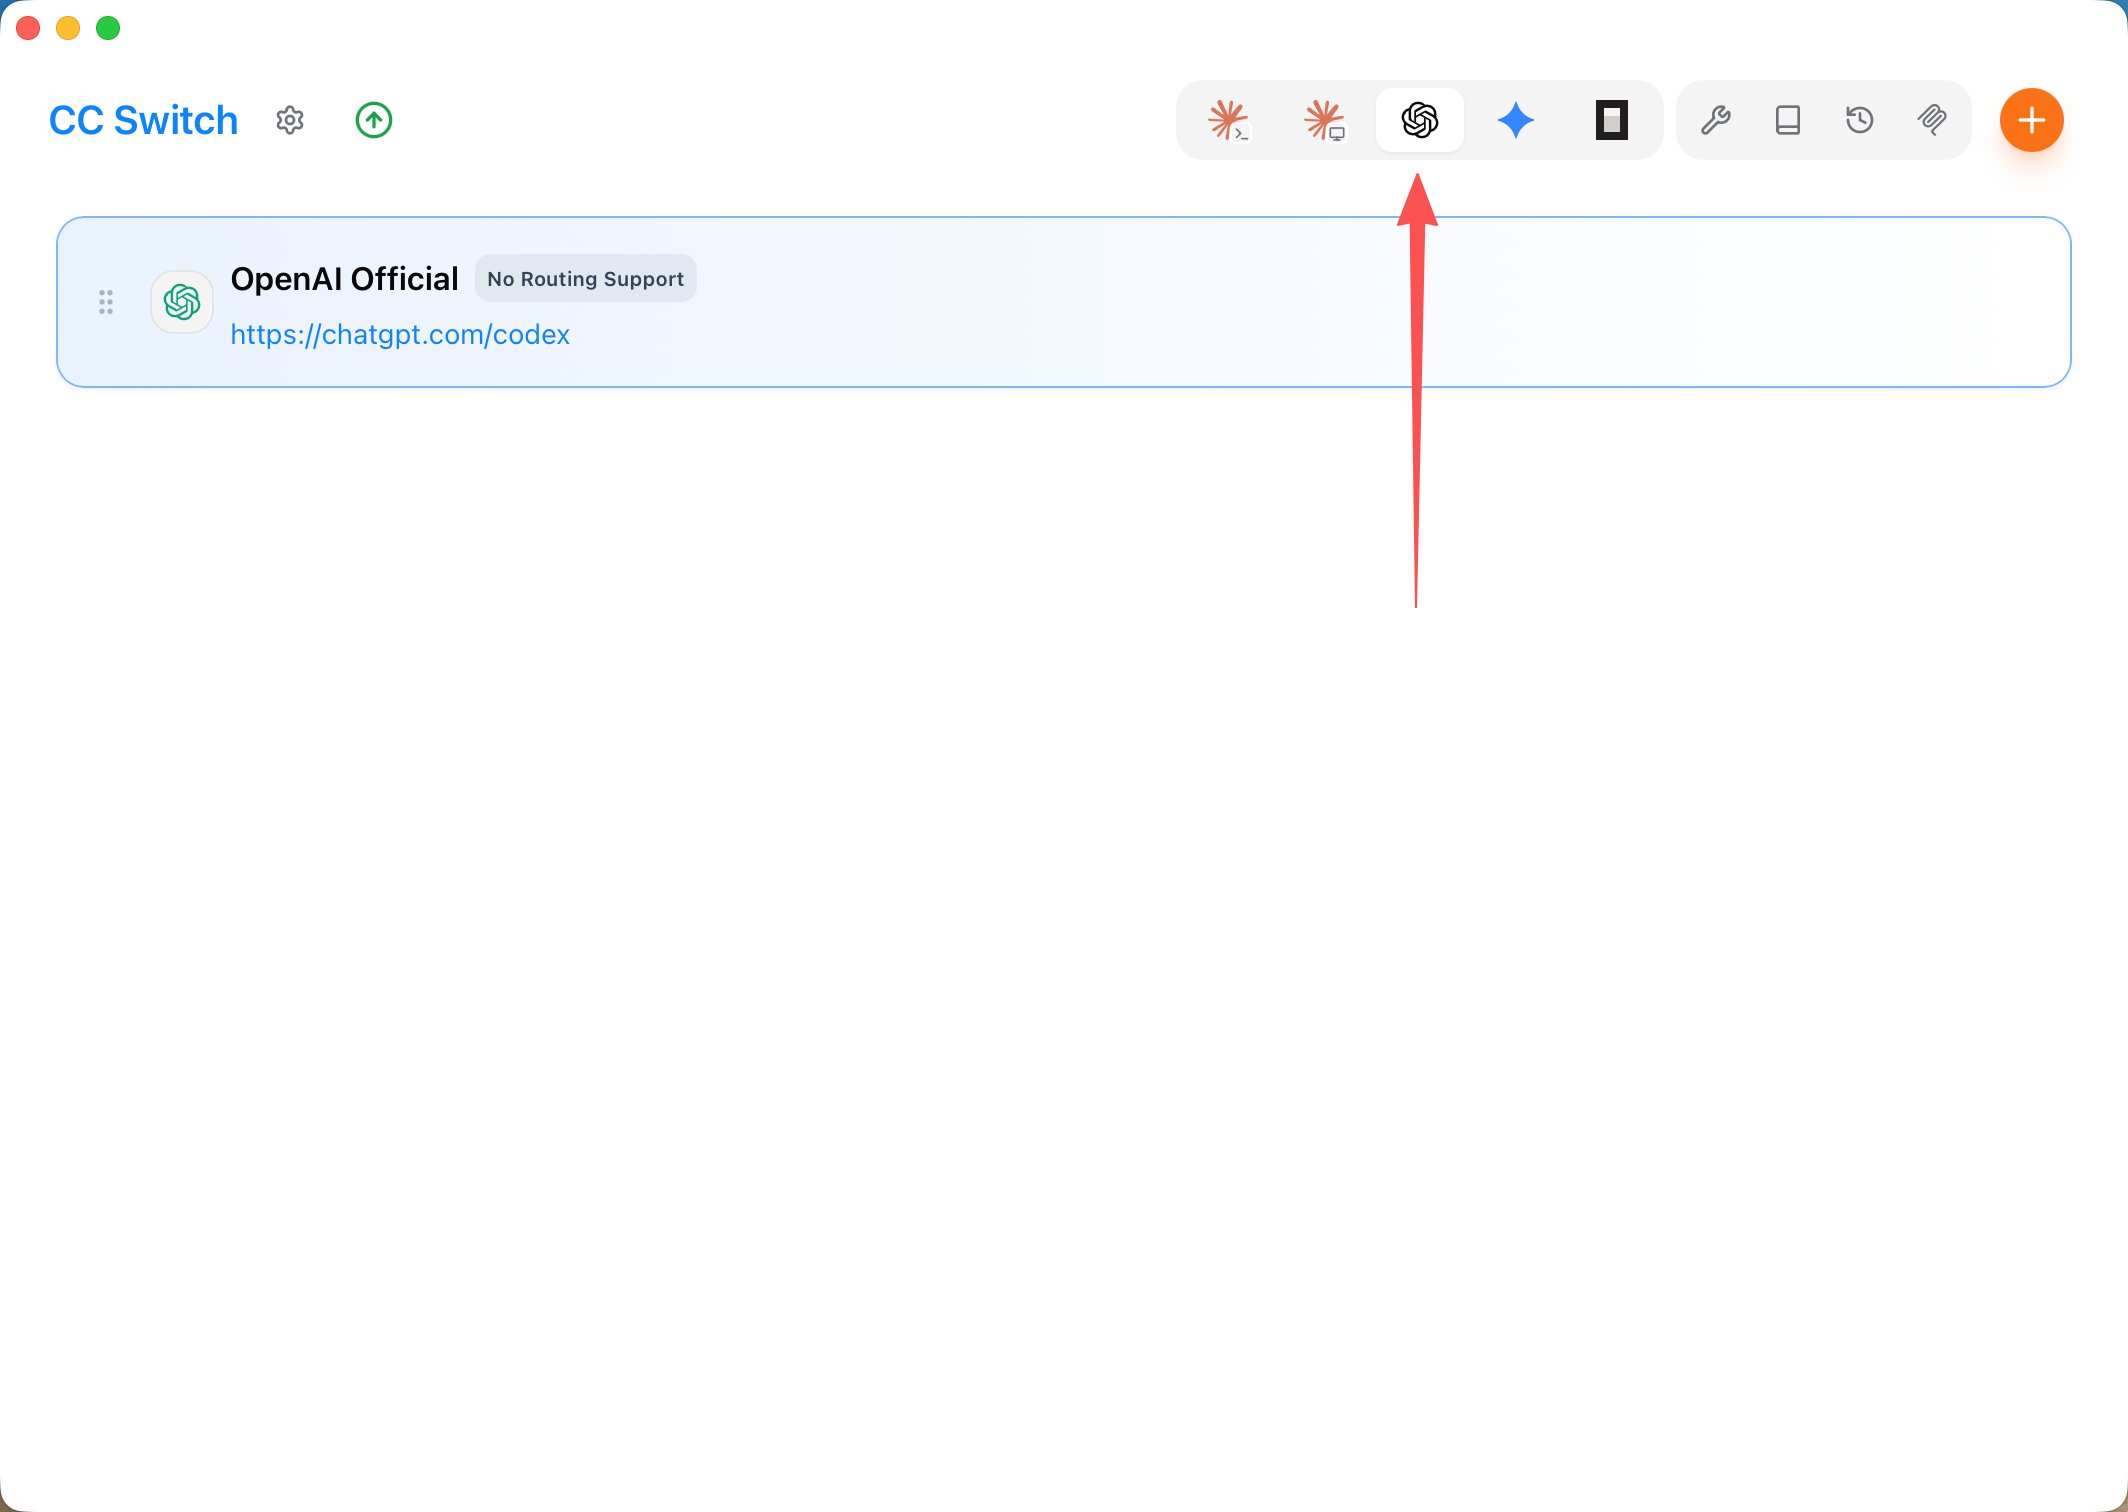
Open CC Switch and click the OpenAI icon in the application switcher to open the provider settings for Codex / ChatGPT.
Select Codex / ChatGPT in the CC Switch application bar
2
Add a provider
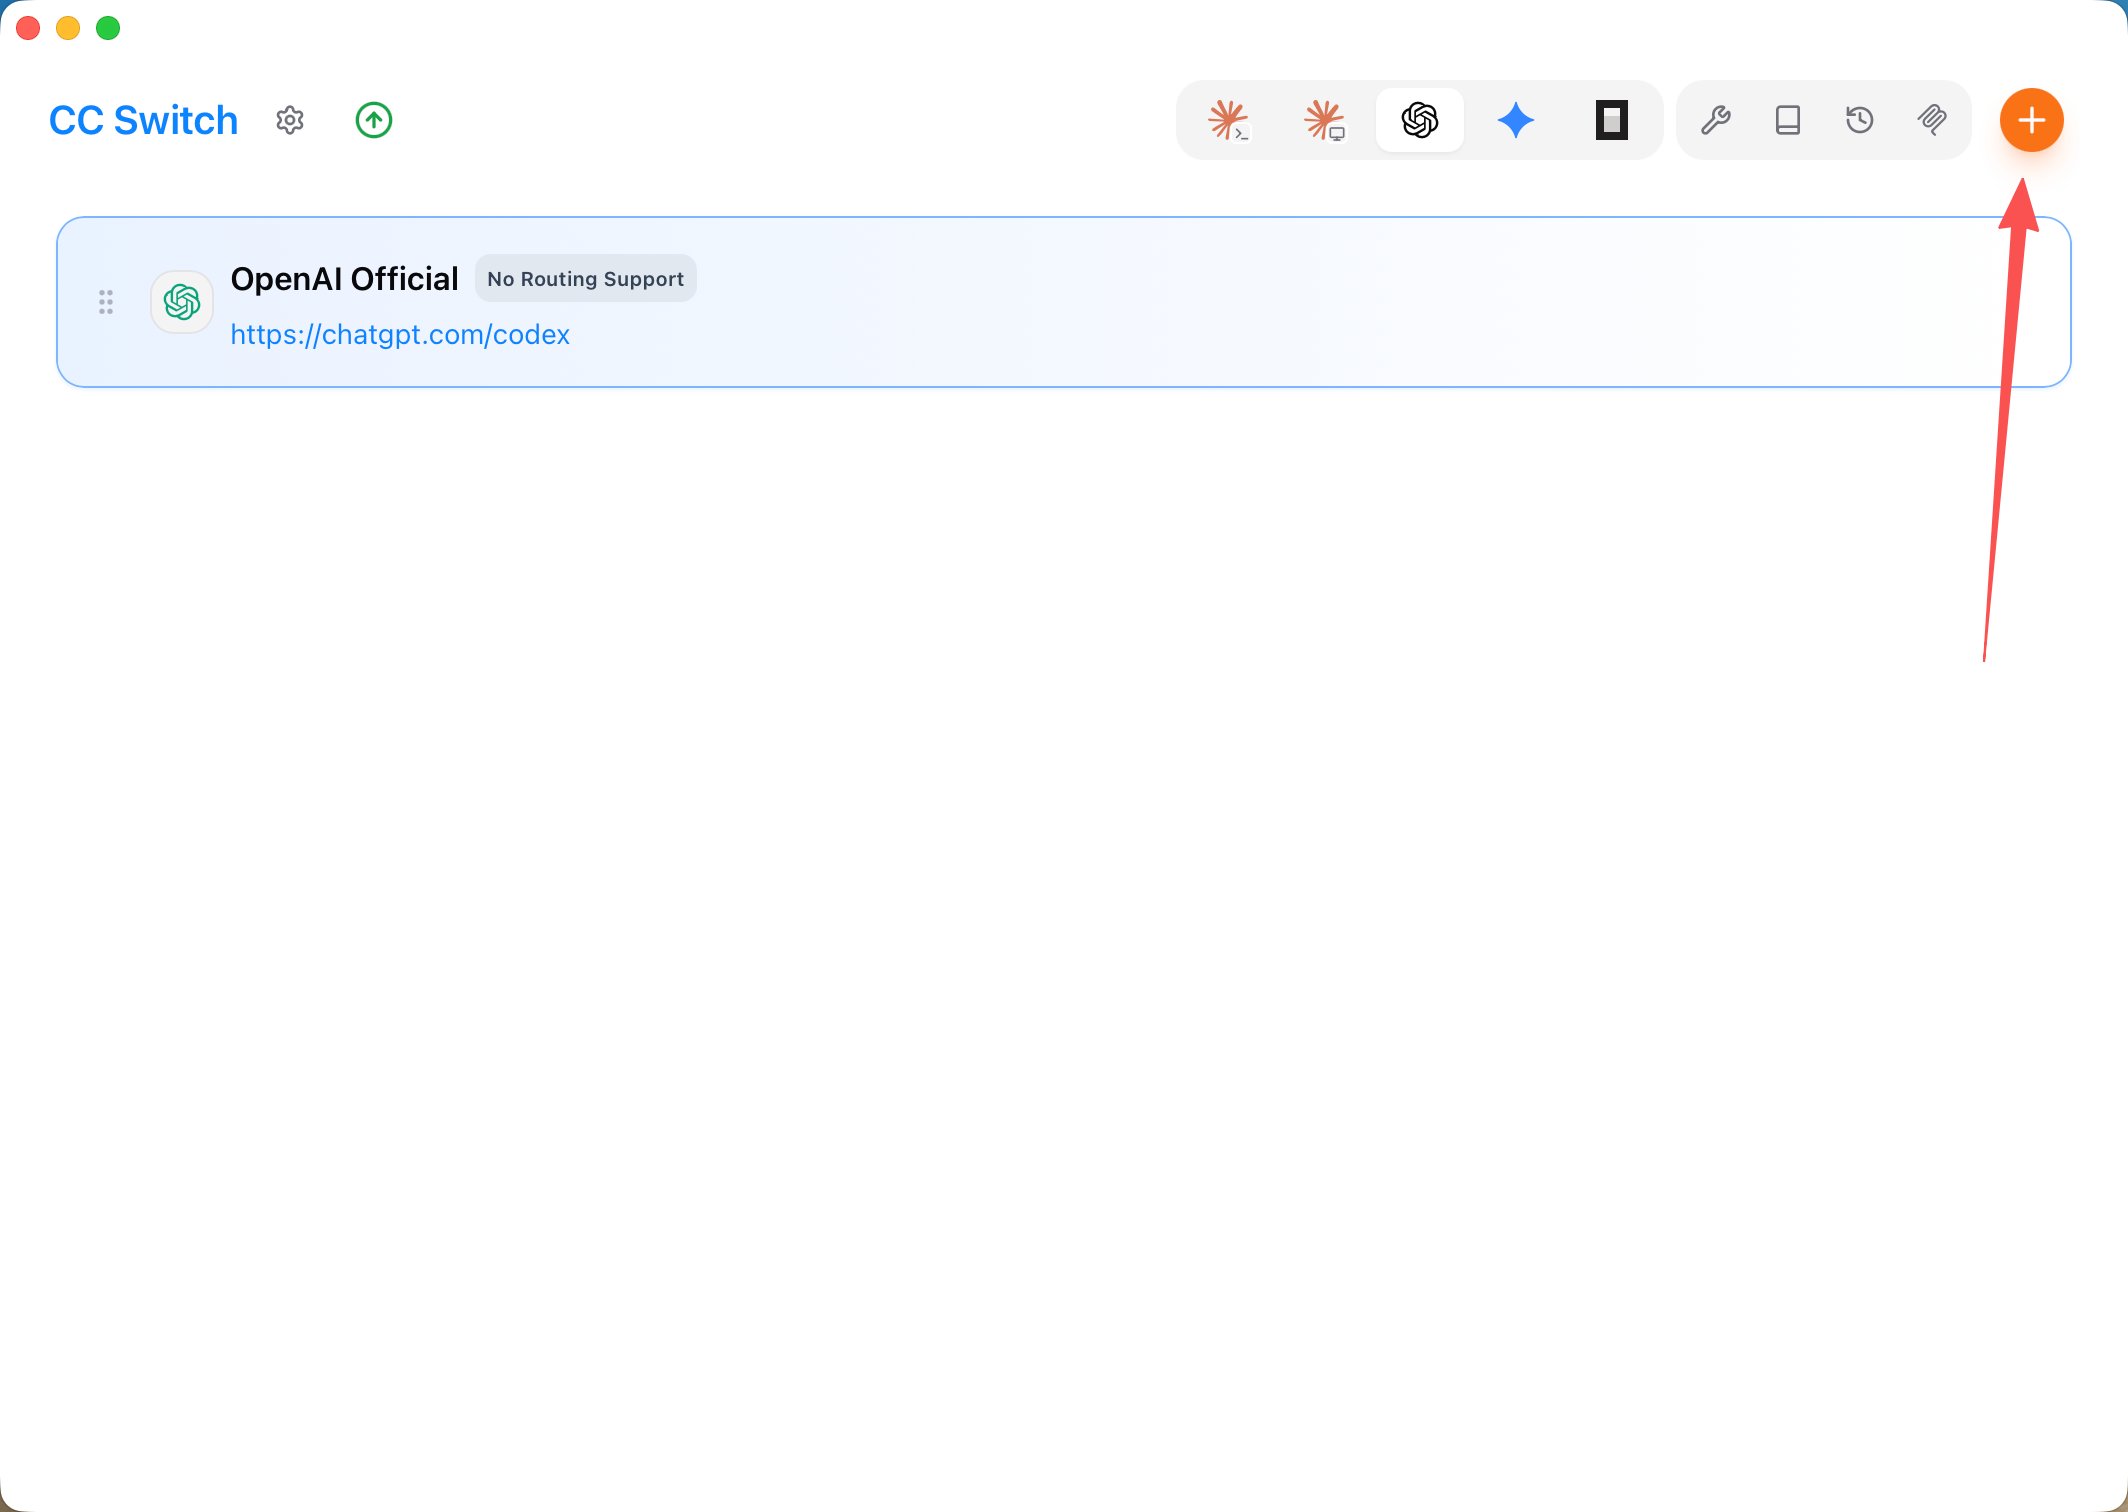
Click the orange + button in the upper-right corner to open the Add New Provider page.
Click the add-provider button
3
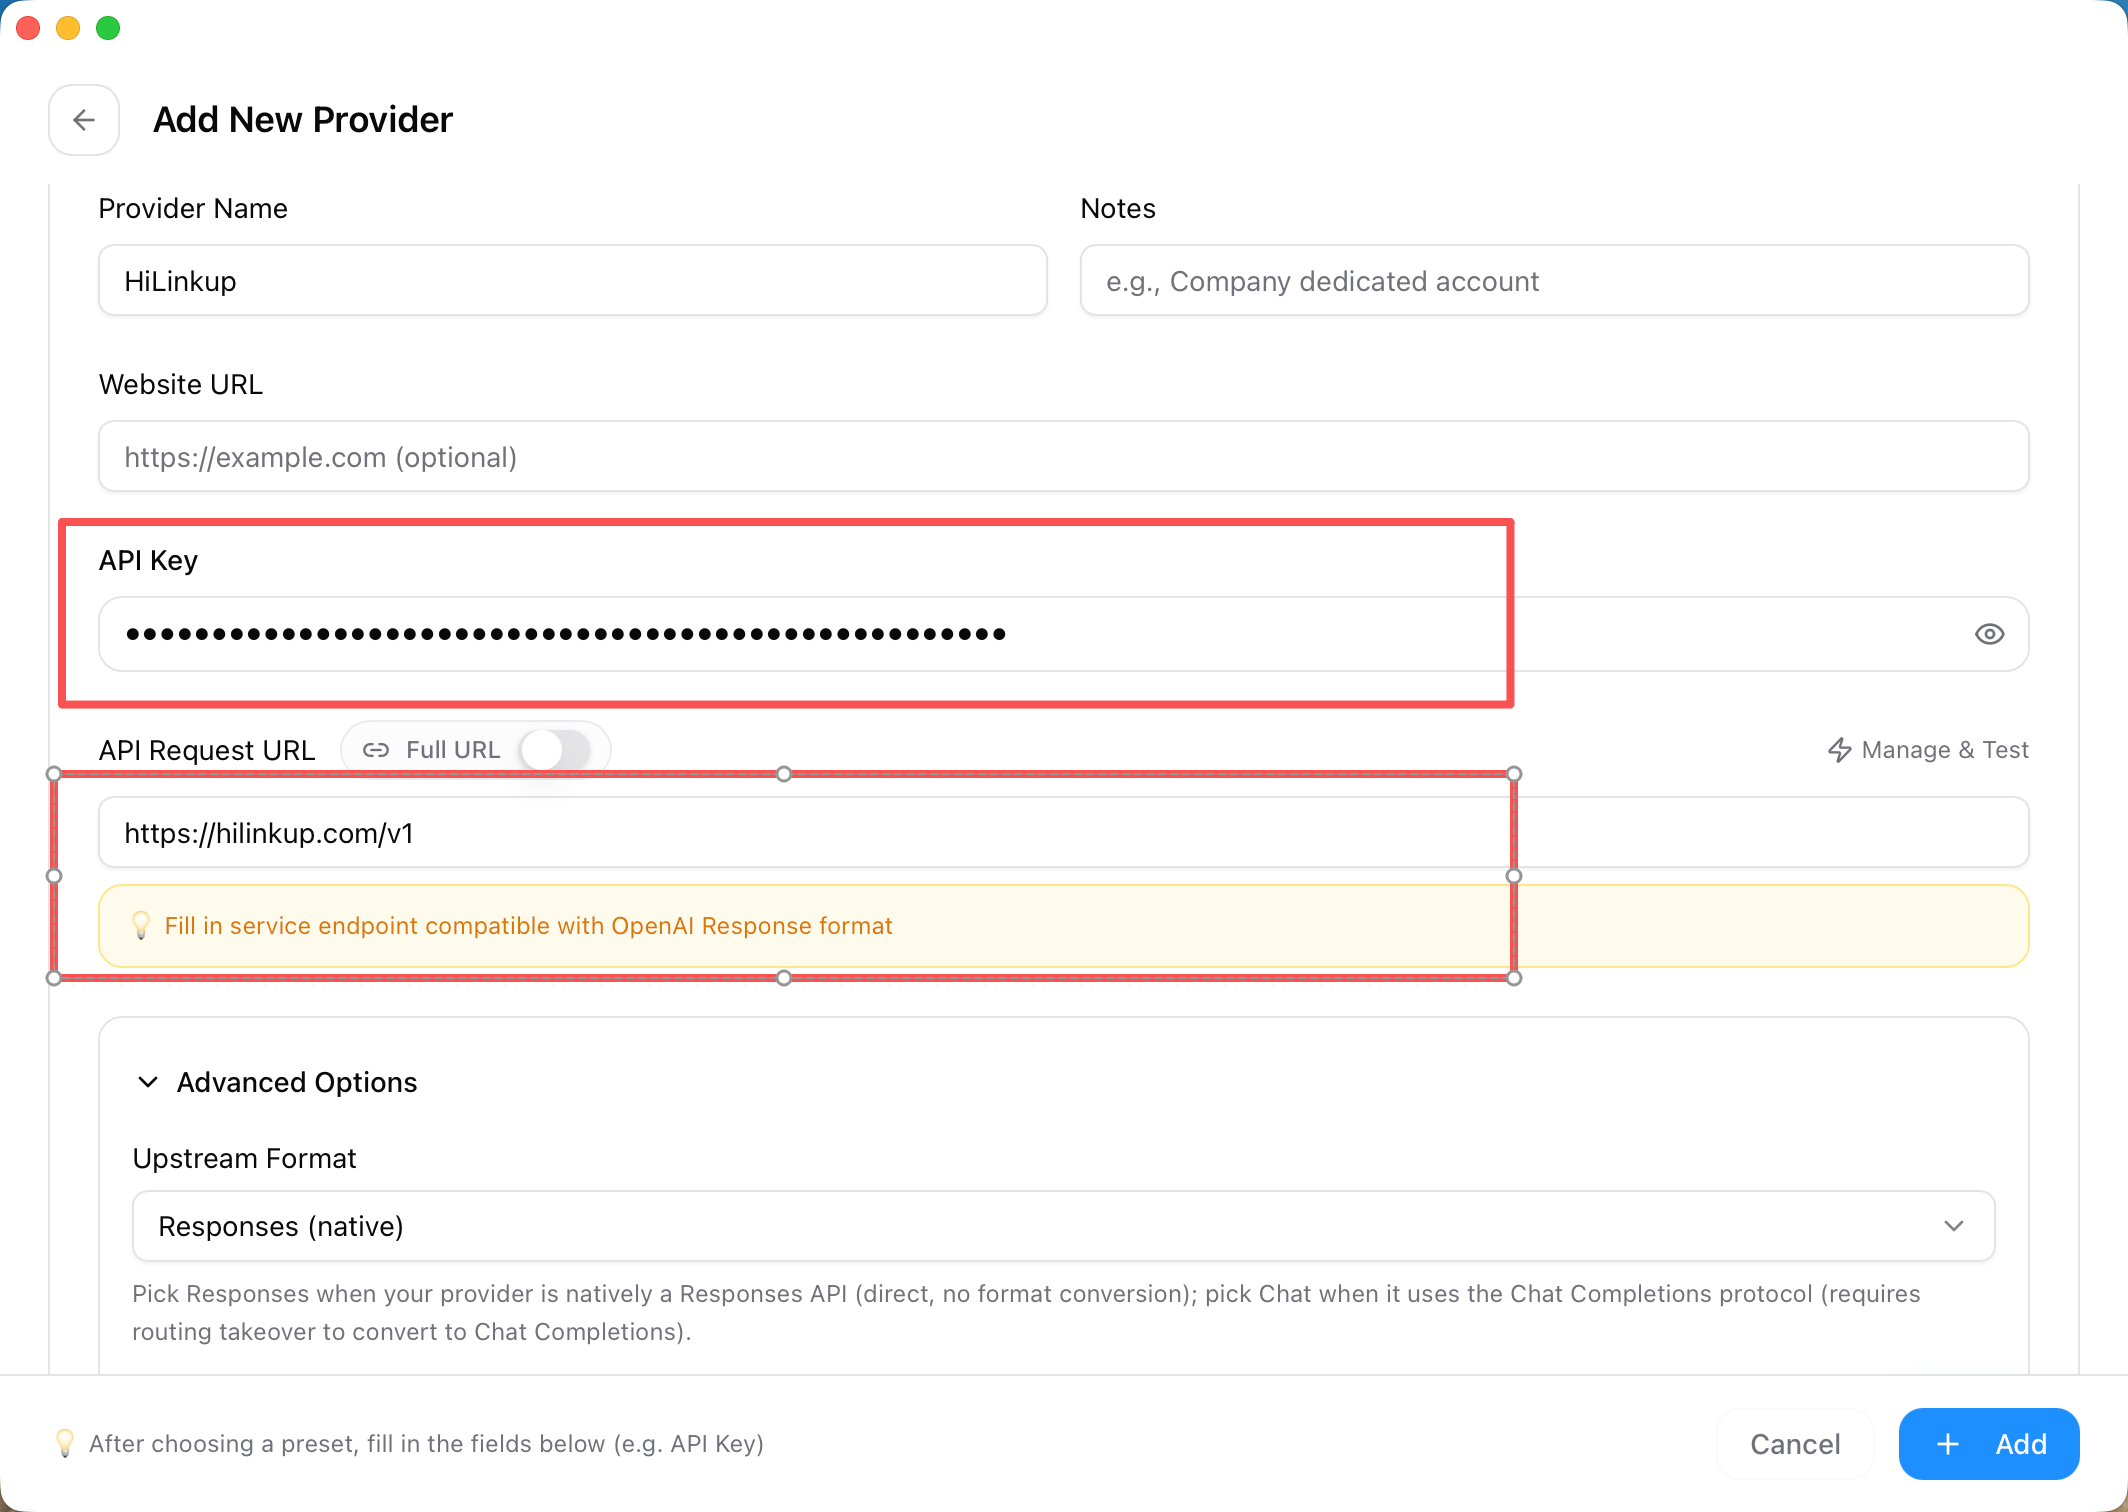
Enter the HiLinkup connection details
Use the following values:
Field
Value
Provider Name
HiLinkup, or another recognizable custom name
Website URL
https://hilinkup.com, optional
API Key
Your API key from the HiLinkup console
API Request URL
https://api.hilinkup.com/v1
Upstream Format
Responses (native)
Keep the Full URL toggle off. HiLinkup supports the Responses API natively, so select Responses (native) as the upstream format.
Enter the HiLinkup API key and request URL, then select Responses (native)
4
Fetch available models
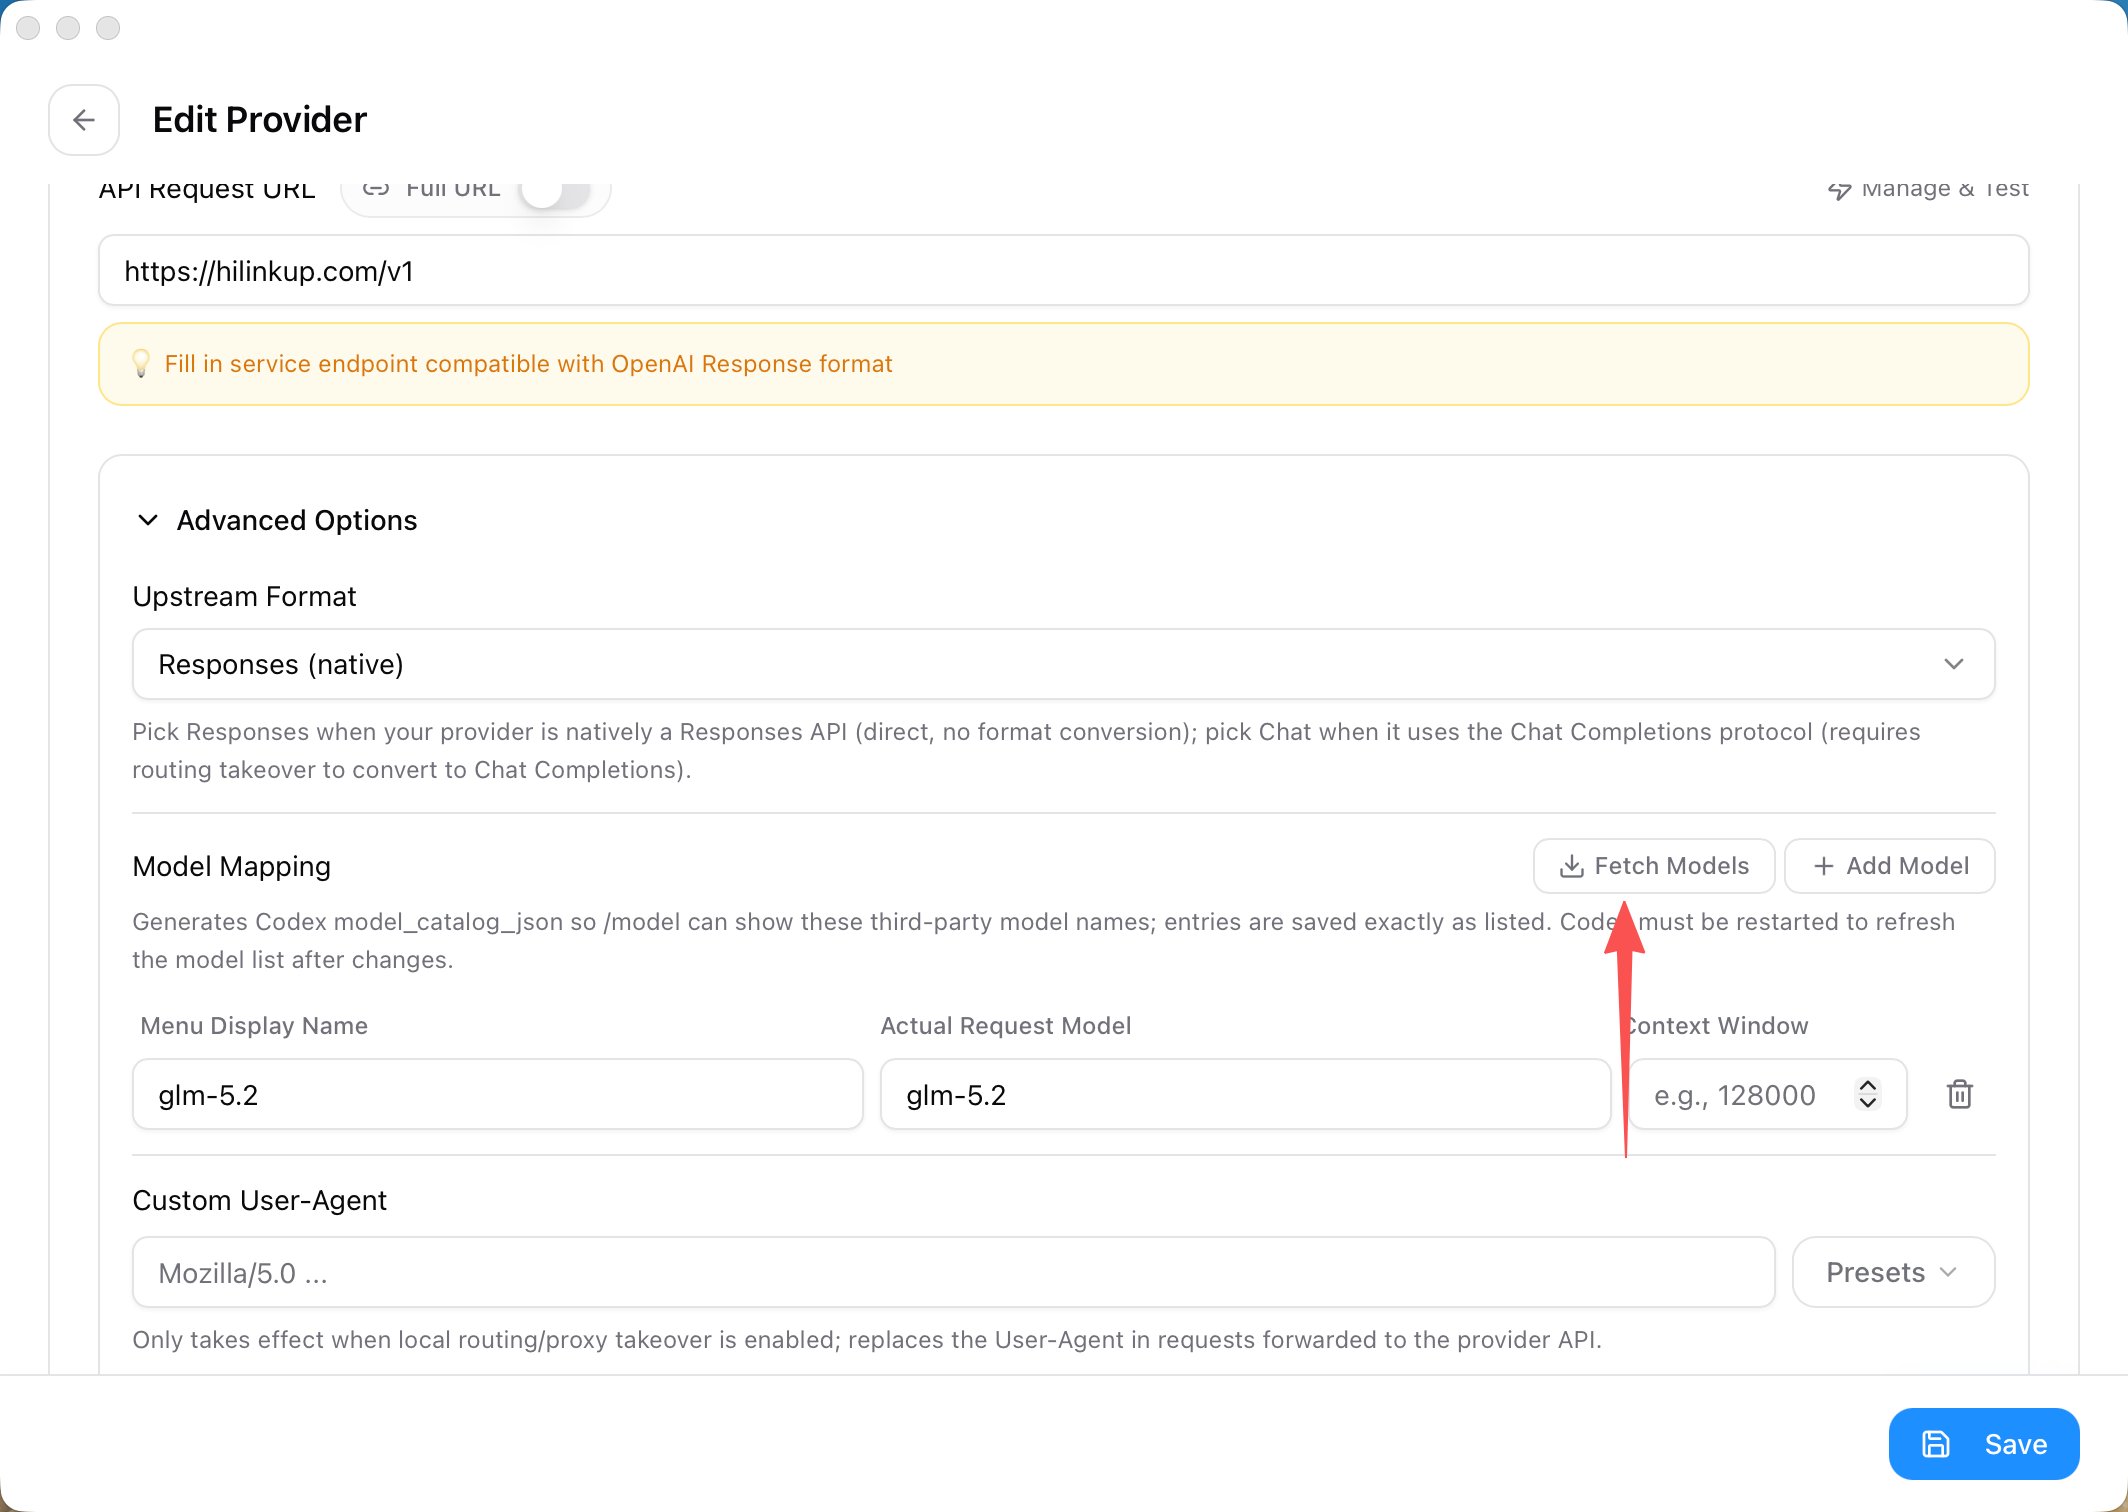
Expand Advanced Options. In Model Mapping, click Fetch Models. CC Switch uses the current API key to retrieve the models available from HiLinkup.
Fetch the HiLinkup model list
If the request fails, verify the API key and the https://api.hilinkup.com/v1 request URL.
5
Add model mappings
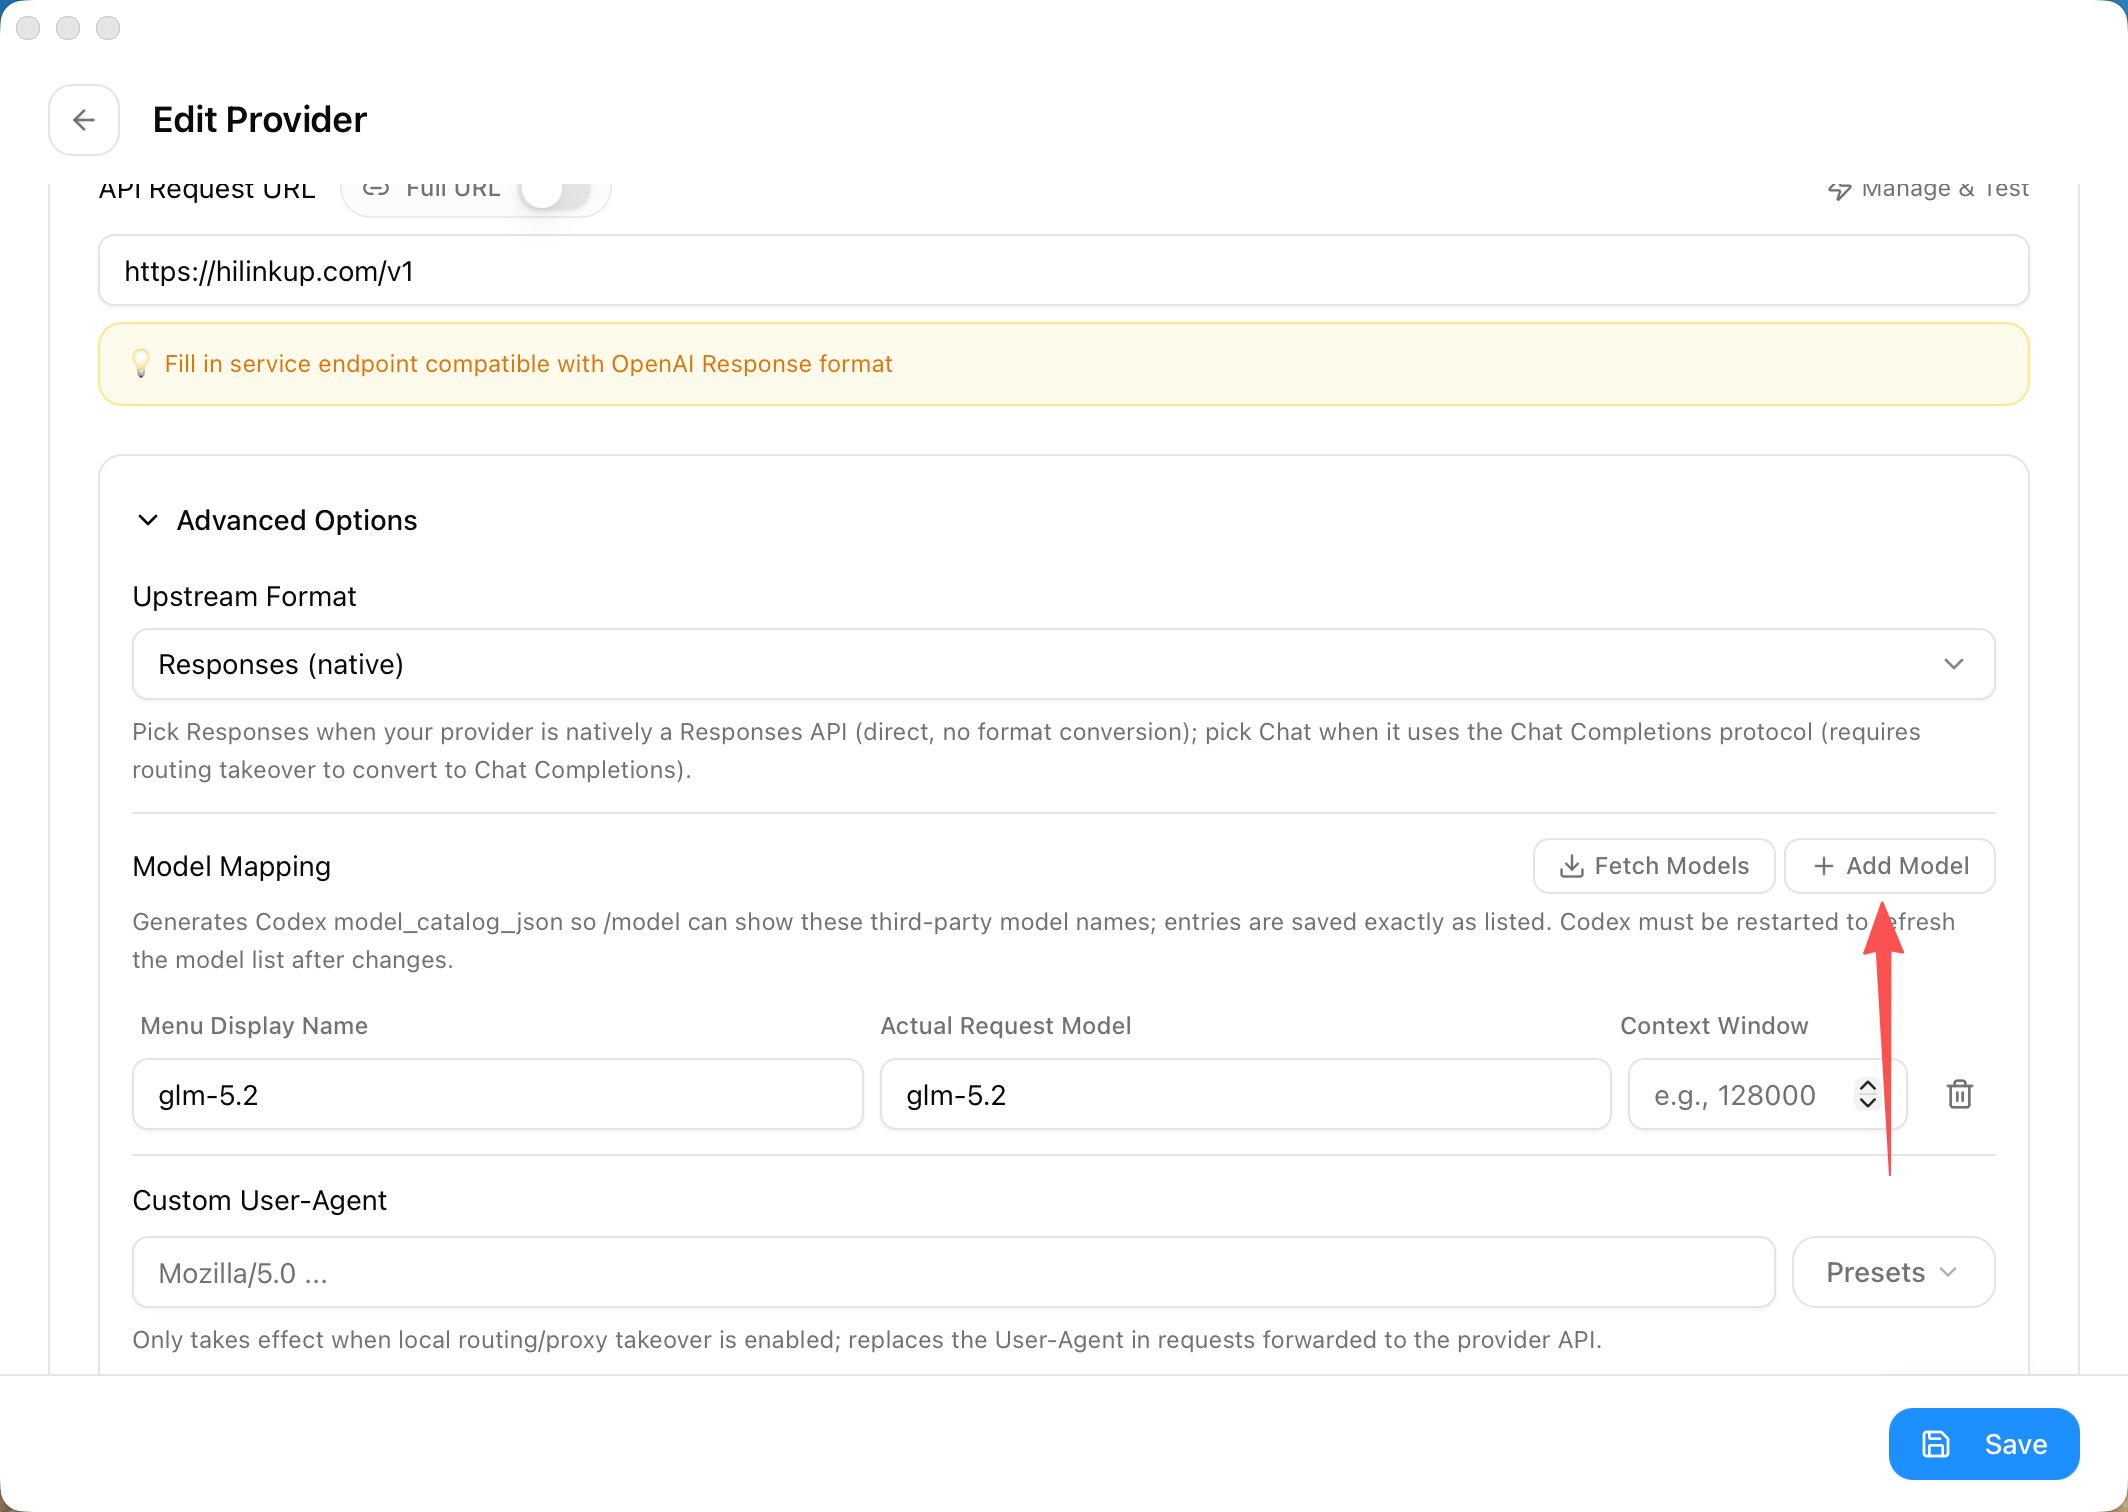
Click Add Model to create a model mapping row.
Add a model mapping
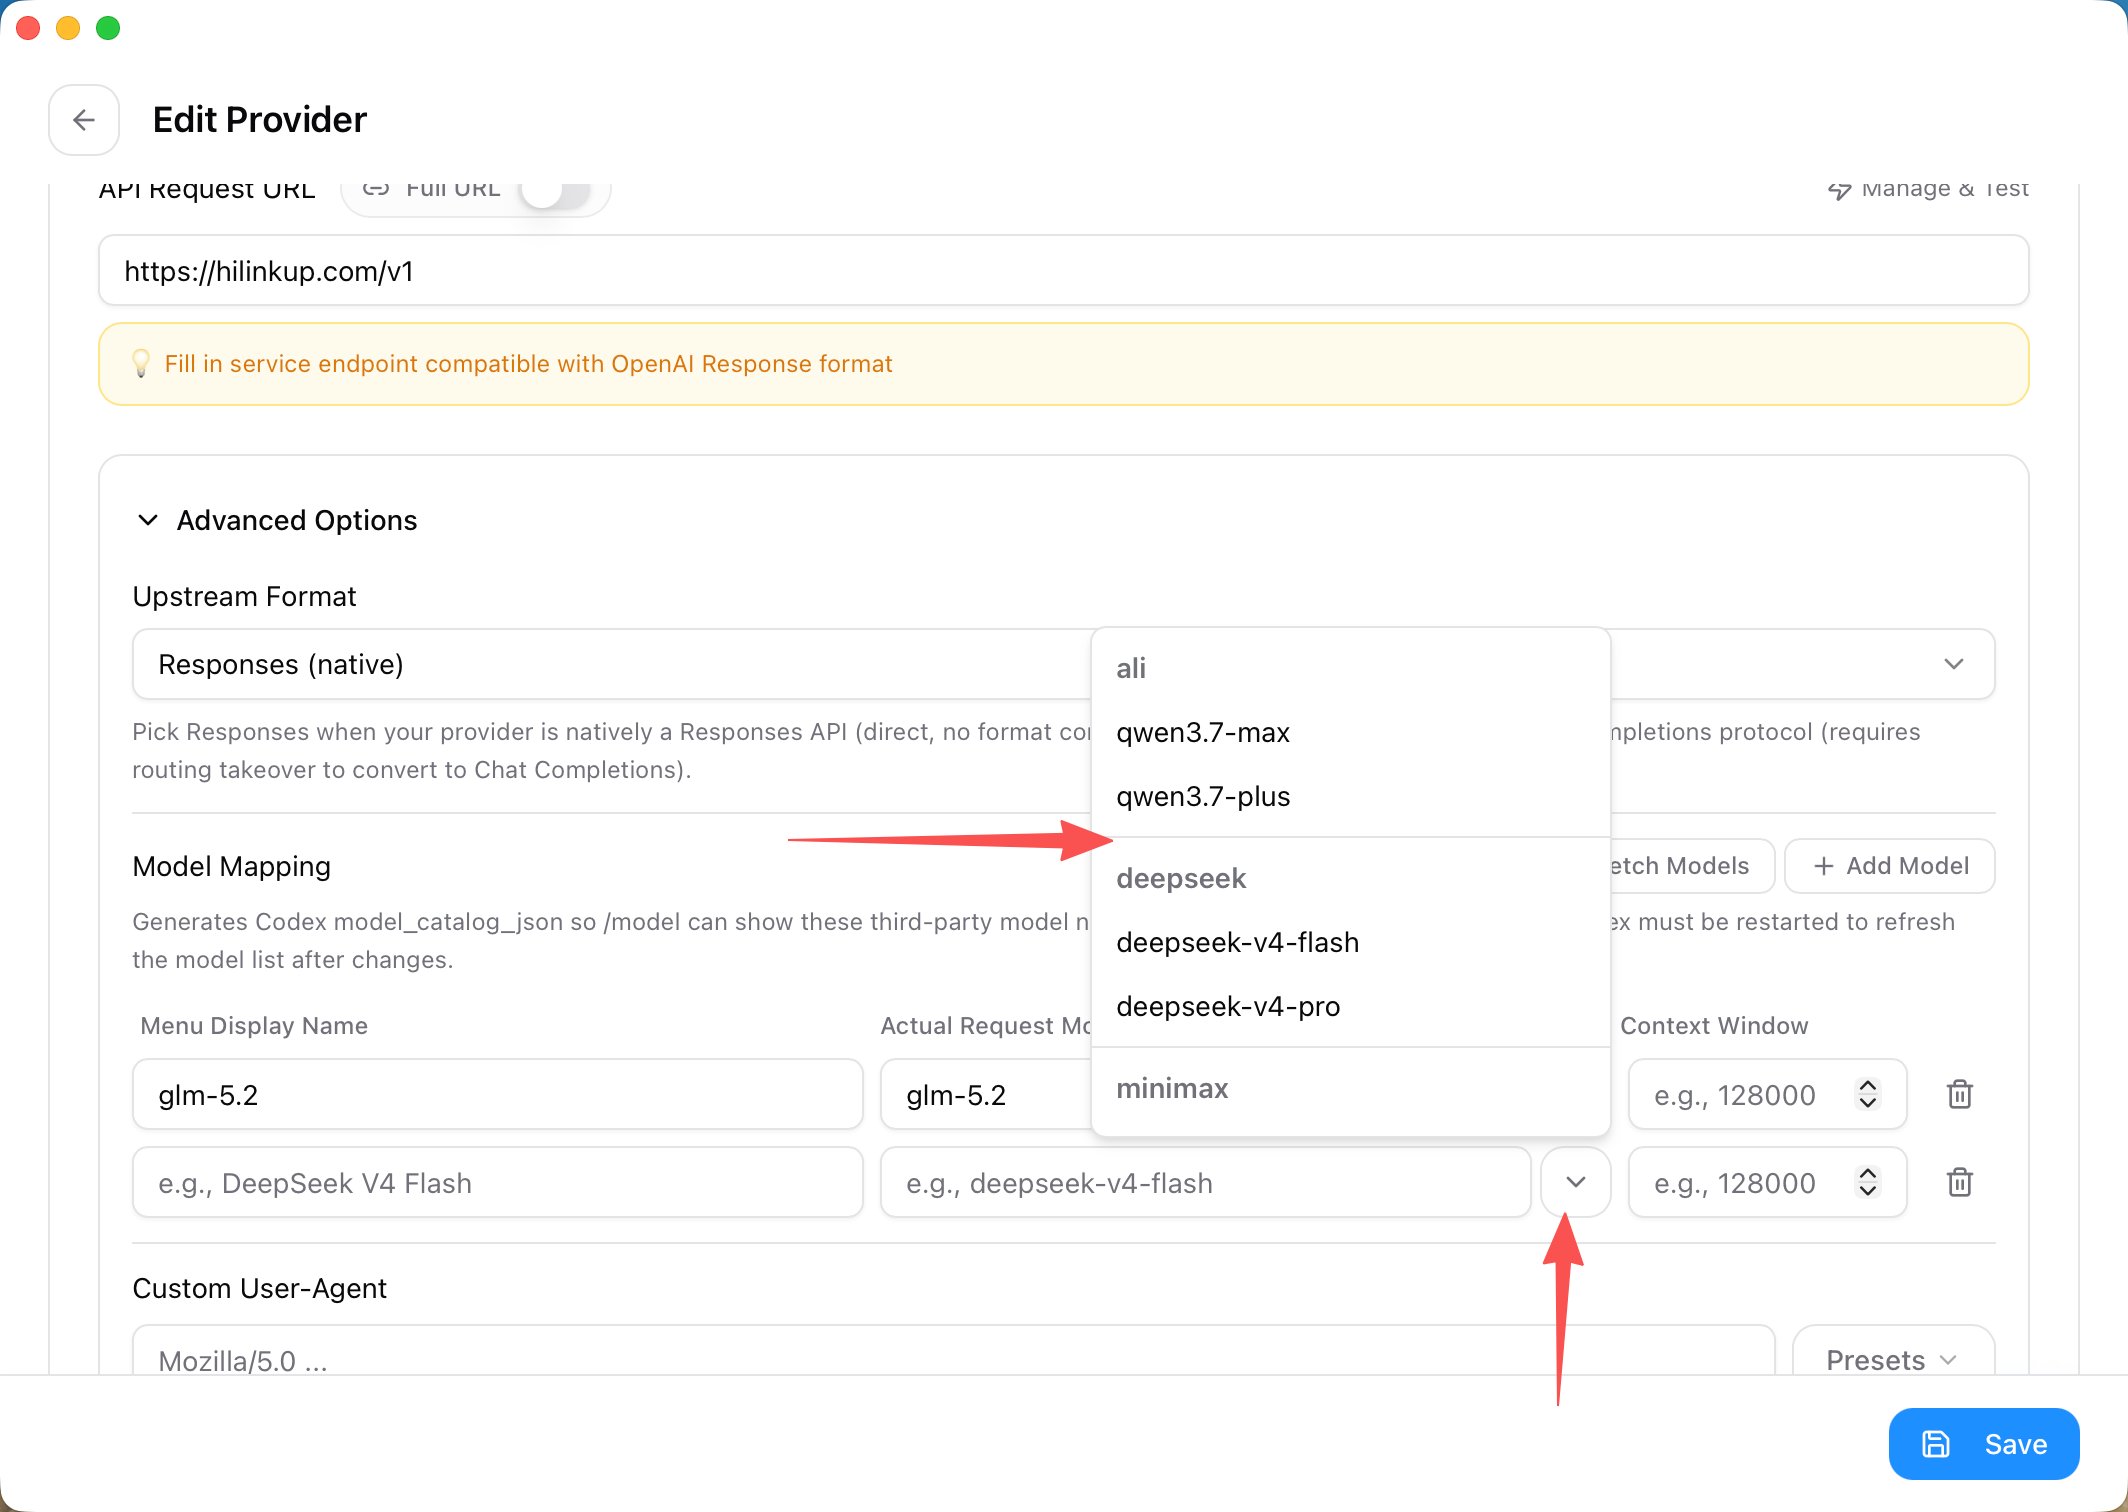
Open the menu next to Actual Request Model and select a HiLinkup model. Menu Display Name controls the name shown in the Codex app and can normally match the actual request model.
Select a model returned by HiLinkup
Repeat Add Model to configure more models. Use the complete provider/model ID returned by the API, such as aliyun/kimi-k3 or z-ai/glm-5.2. Omitting the provider and entering only kimi-k3 uses the platform’s current default provider setting.
6
Save the configuration
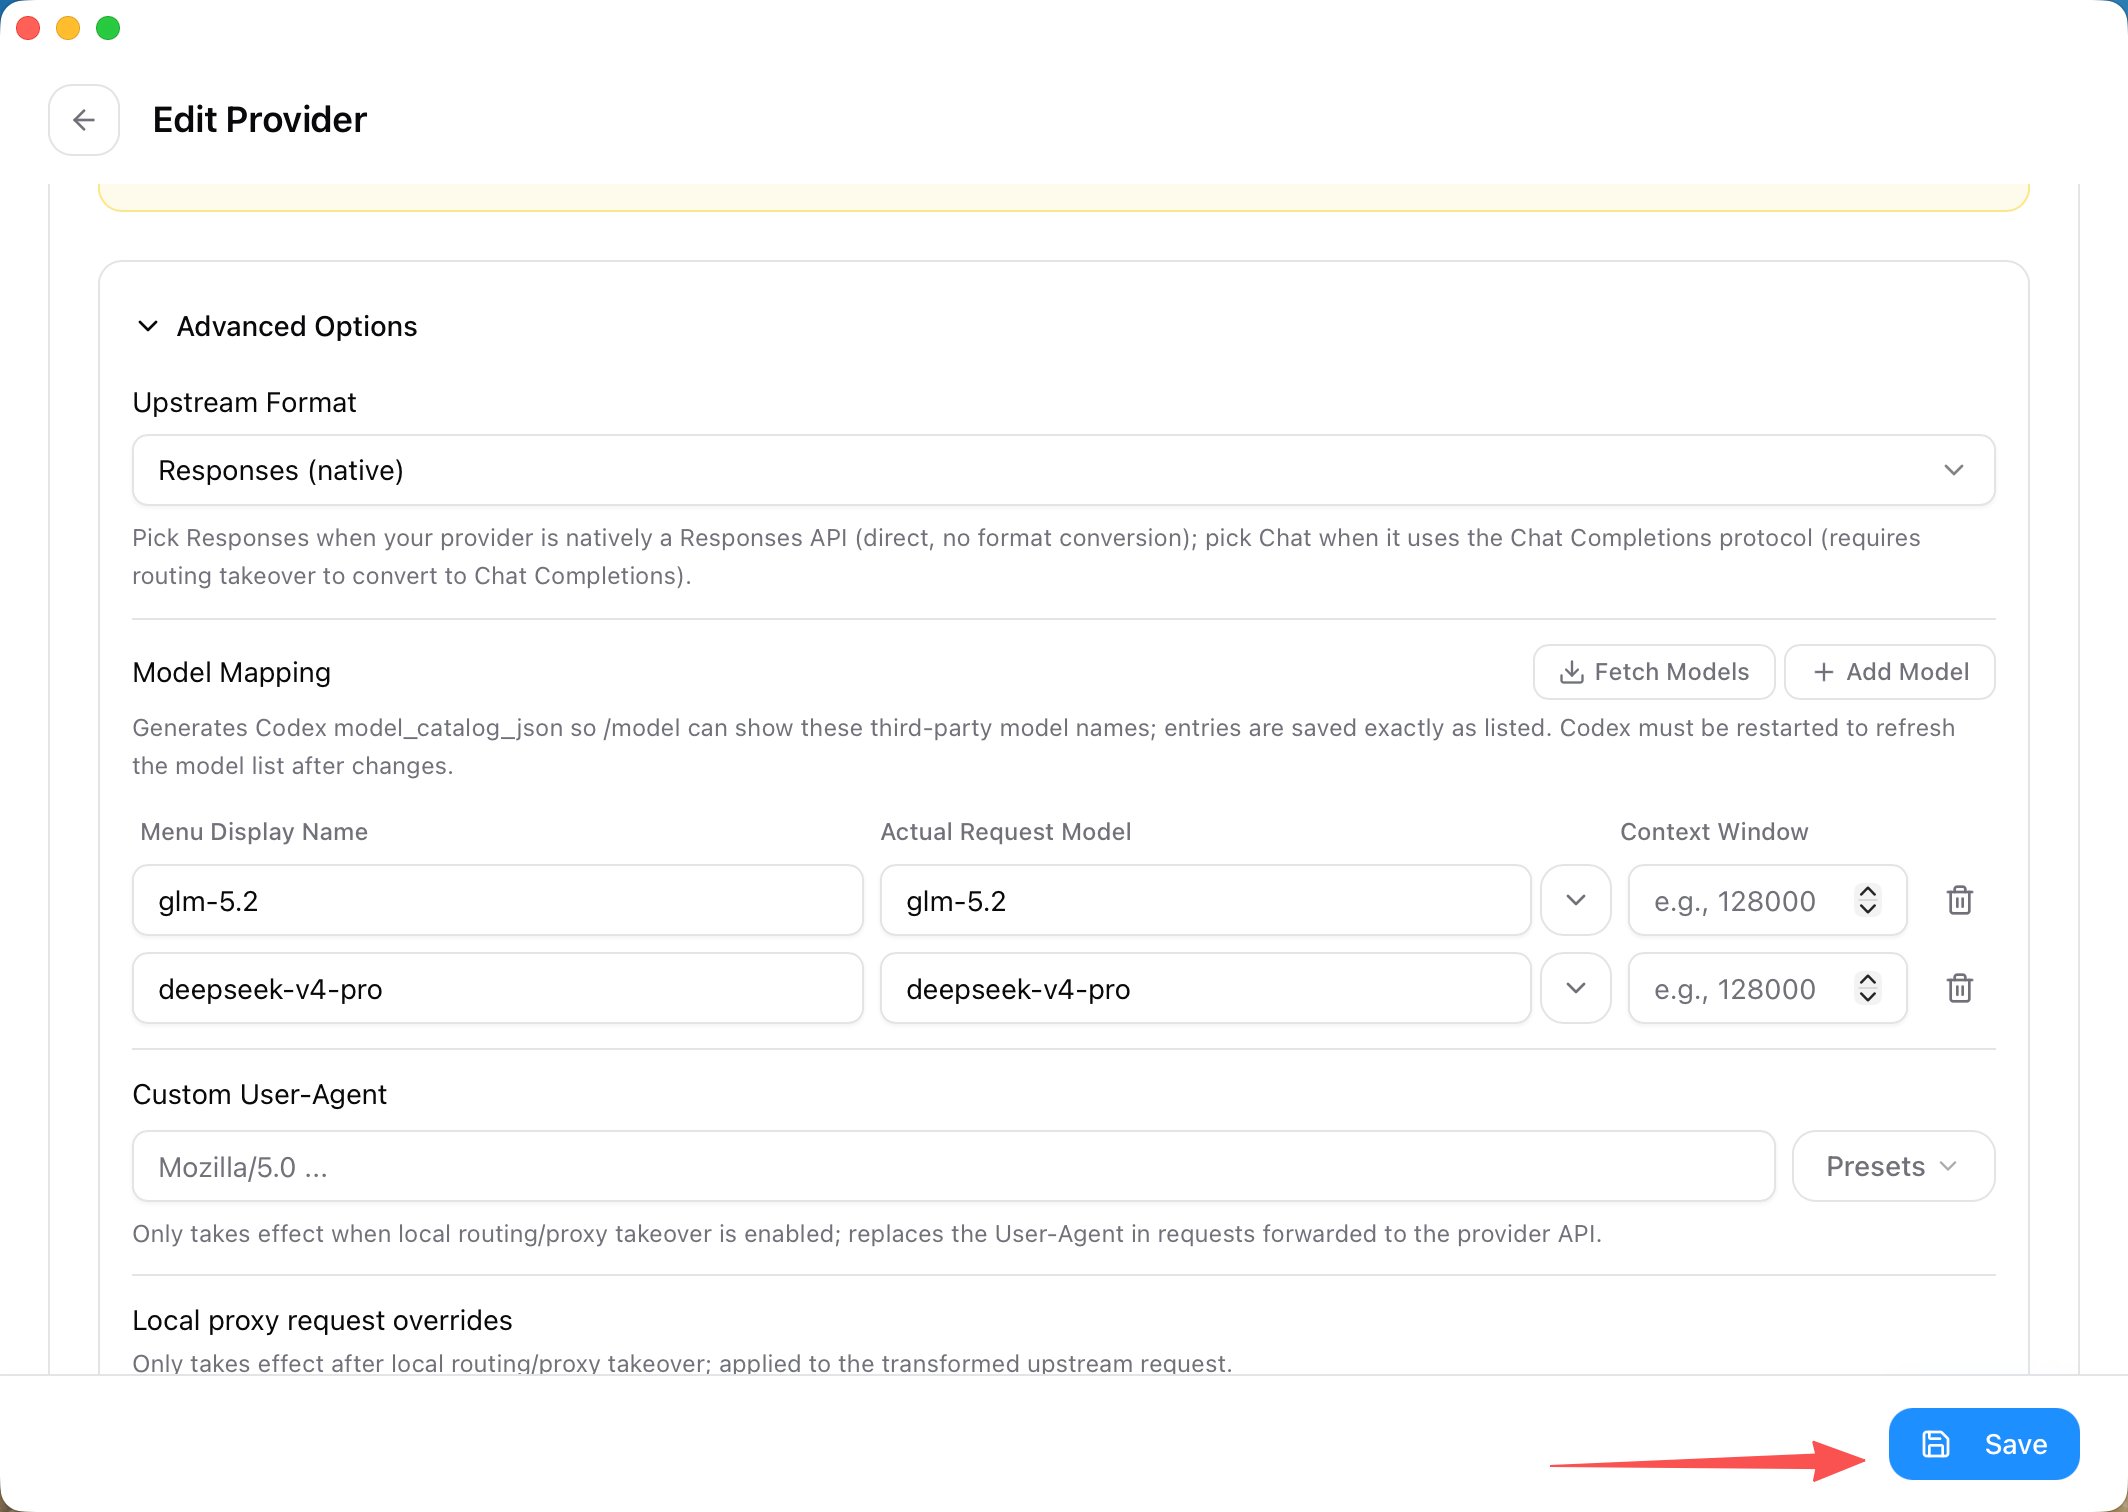
Confirm the display names and actual request models, then click Save in the lower-right corner.
Save the HiLinkup provider and model mappings
7
Restart Codex and select a model
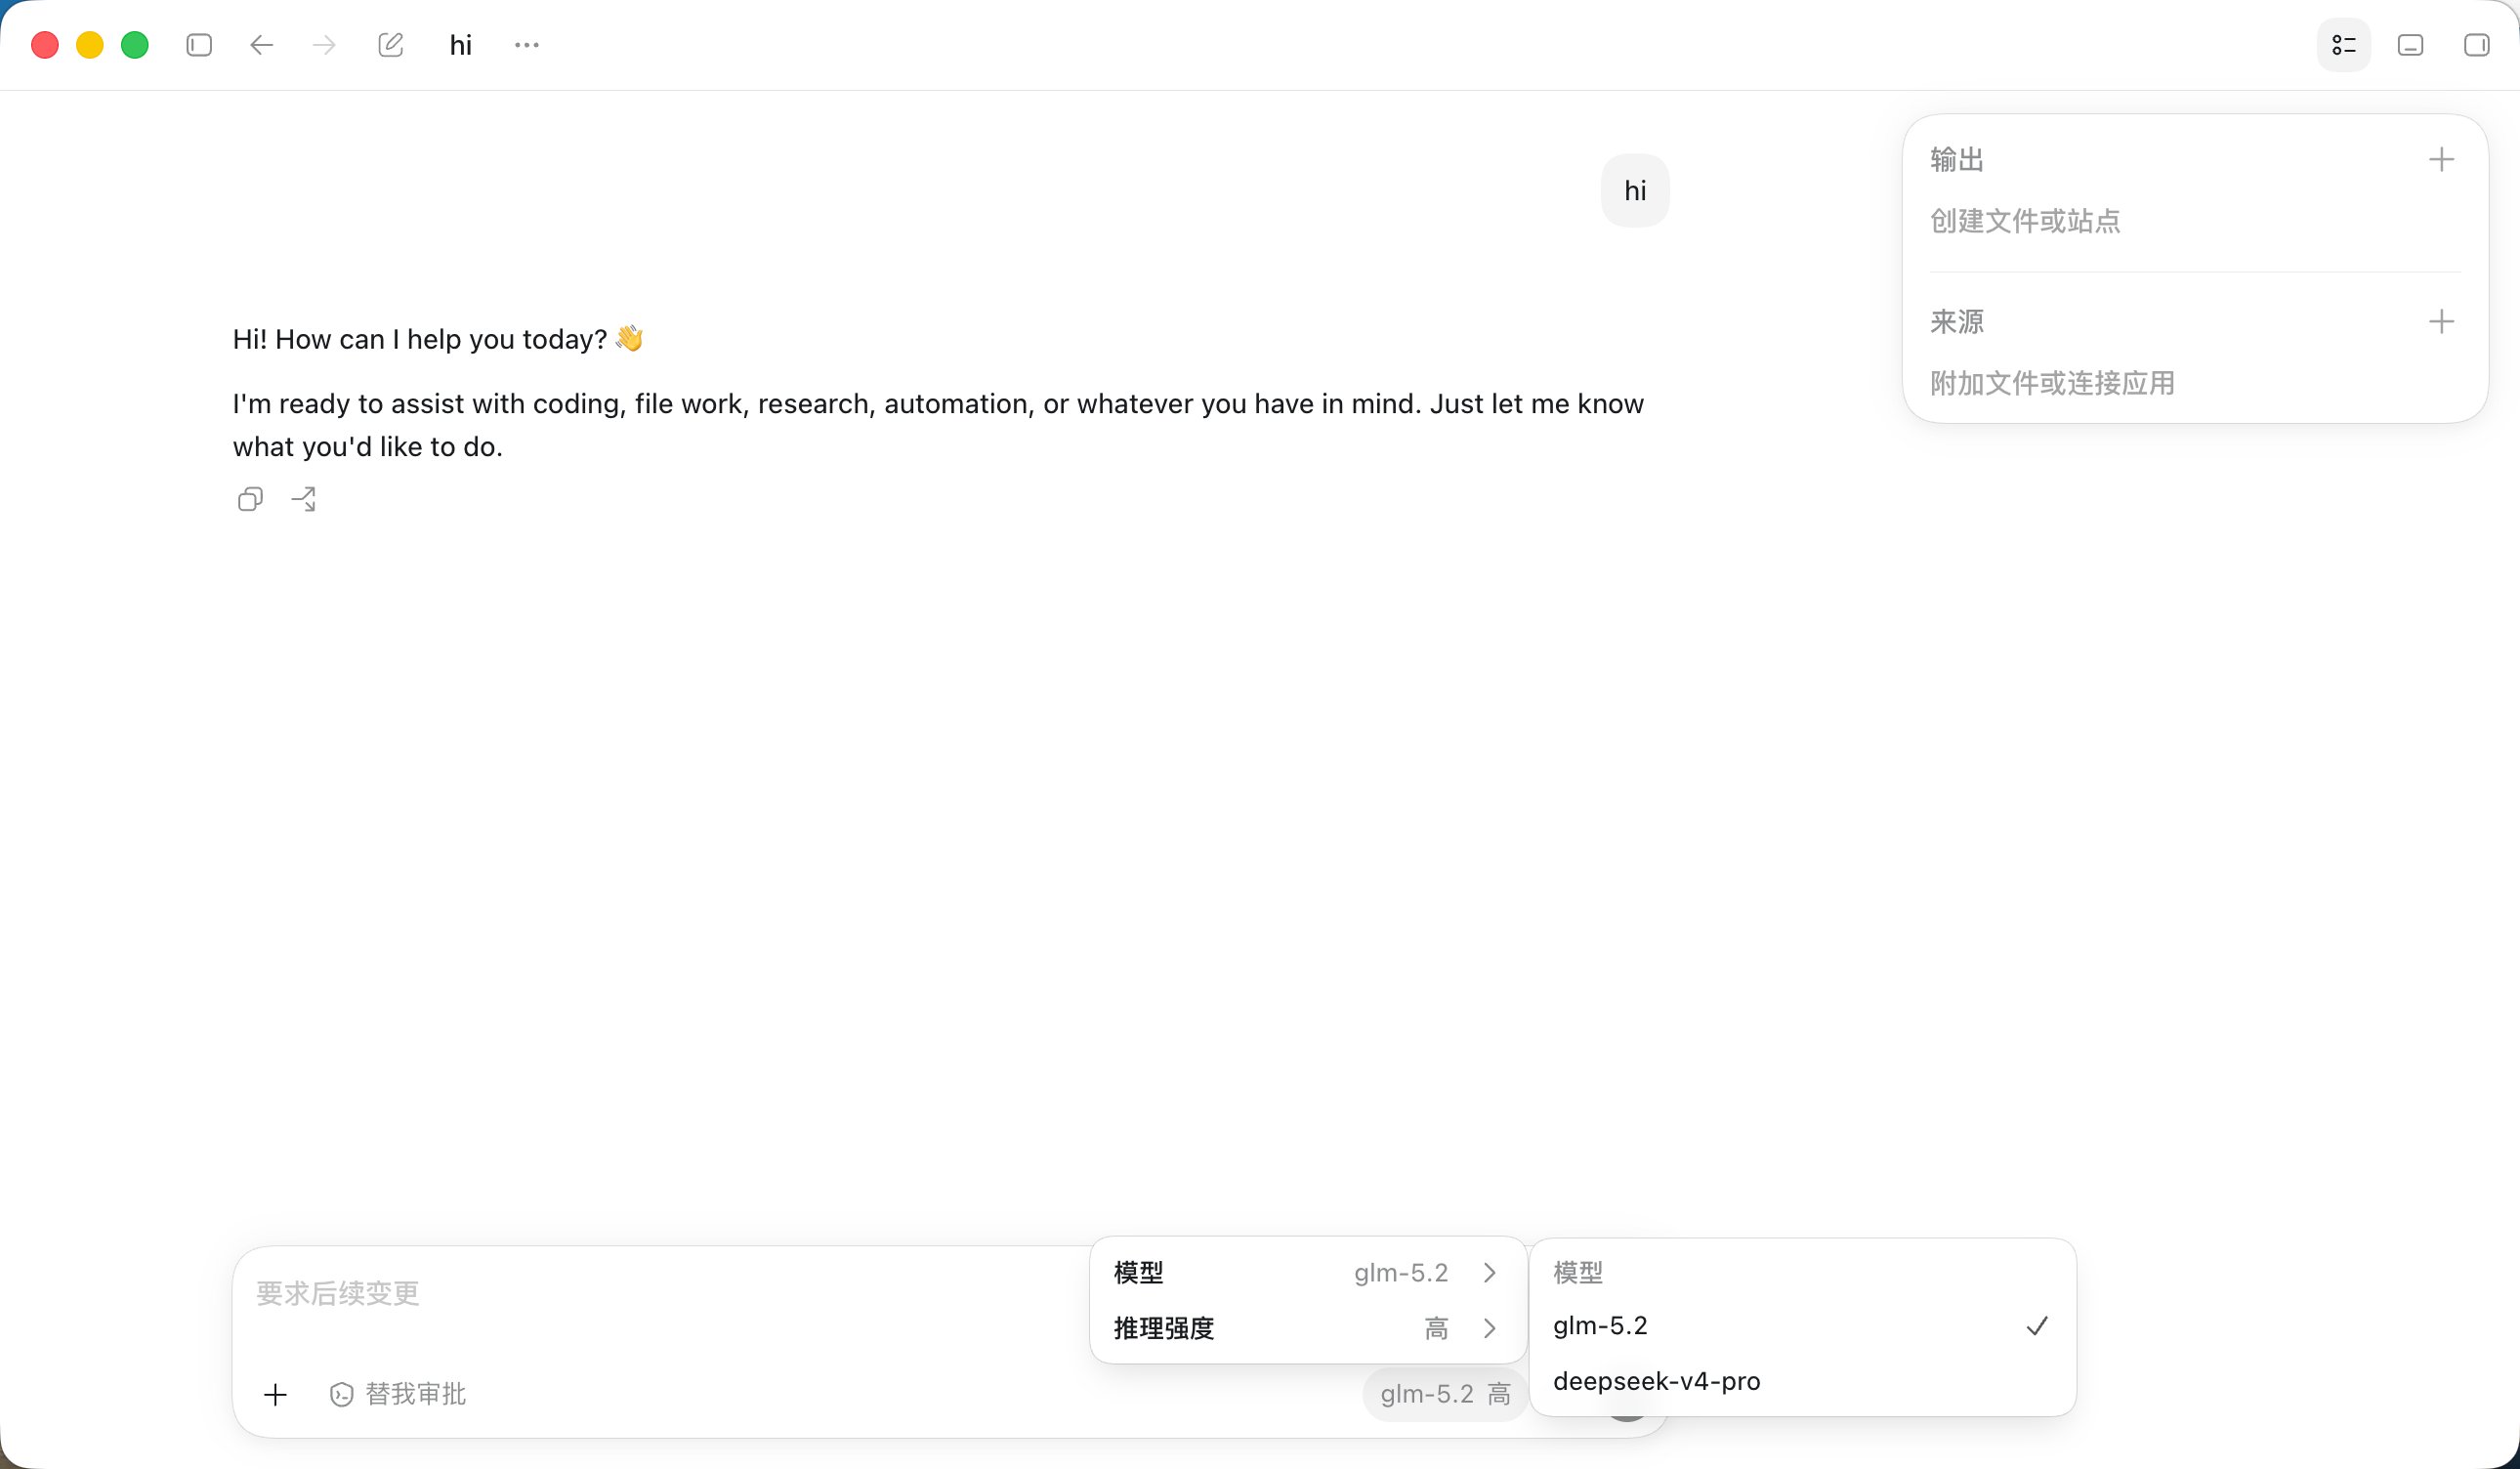
Fully quit and reopen the Codex desktop app. Open the model menu next to the prompt box, select a configured HiLinkup model, and send a short test message.
Select a HiLinkup model after restarting Codex
The setup is active when the models appear in the Codex menu and a selected model returns a response.
Confirm that you clicked Save in CC Switch, then fully quit and restart the Codex desktop app. The model catalog does not automatically refresh after configuration changes.
Fetch Models fails
Verify the API key, use https://api.hilinkup.com/v1 as the request URL, and keep Full URL off. You can also validate the key with List models.
The model appears, but requests fail
Confirm that Upstream Format is set to Responses (native) and that the selected model supports the Responses API. Test the model first with the cURL example in the Responses API guide.
Which model name should I enter?
Use an exact model ID returned by Fetch Models. You can customize Menu Display Name, but Actual Request Model must exactly match the model ID returned by HiLinkup.